Office (window)
Last updated: 24 June 2026
![]() Settings > Offices
Settings > Offices
In this article
The settings configured in this window are called the office settings. Many general settings, which are often used as default settings, are set here. The same settings can then be made at lower levels of the system, such as at the region, customer and customer reference levels, to customise the system in more detail.
General
Information
This information concerns your company.
|
Function |
Description |
|---|---|
|
Name |
Your company name. |
|
Code |
Abbreviation of your company name. |
|
Corporate ID number |
Your corporate ID number. |
|
|
Email address used as sender for emails sent from Opter, such as notifications and emails to subcontractors. You can have different addresses for different regions and for financial mailings, such as invoices. For more information, see Alternative email addresses. |
Images
|
Function |
Description |
|---|---|
|
Small image Large image |
These images are used in reports, such as invoices and Freight bills, with the report tags OFF_SmallImage and OFF_LargeImage. To add more images, open the image library at In this example, there is a condition on the image (condition), which makes the name from the tab Invoice details (OFF_NameInv) appear if there is no large image. |
Default selections
This tab can be used to specify some of the default settings used if they have not been specified in the relevant registry.
|
Function |
Description |
|---|---|
|
Start number for ledger no. (customer) |
The starting value for the sales ledger number in the customer registry. For example, if you want the sales ledger number to consist of at least four digits, you can write "1001" here. This setting does not apply to the supplier and subcontractor registries. |
|
End number for ledger no. (customer) |
The maximum value for the Sales ledger number field in the customer registry. The maximum number that can be entered is "2147483647" (10 digits). If you leave this field blank, you can enter up to 38 digits in the Sales ledger number field. This setting does not apply to the supplier and subcontractor registries. |
Weight/Distance
This tab can be used to control the weight calculation, weight correction, sources of geographical data and route optimisation.
Weight factors
|
Function |
Description |
|---|---|
|
Weight calculation |
Select weight calculation from the drop-down list. Click on |
|
Update collection freights automatically |
We recommend that a consignment is created rather than using collection freight. For more information, see Consignment, overview.
|
|
Extra for weight correction |
The weight correction can automatically add a surcharge if the initially specified weight or volume of the order is less than the sum of the weights or dimensions of the package rows measured. For more information, see Weight correction. If you want to add an extras, select one. Select [None] if you do not want to add any extras. The prices of the extras are set in the price lists. |
Sources for geographical data
|
Function |
Description |
|---|---|
|
Address positions |
The service used to find positions for sender and recipient addresses. Regardless of the service you use, a check is always made to see if there is a manually adjusted position for the address first. Then the service you choose below is used. For more information, see Addresses and address positions.
If you use Google Maps or PTV v2 and have problems with incorrect address positions, you can try clearing the cache by clicking on Help > Diagnostics > Clear address position cache, so that the positions can be reloaded from the service. For more information, see Help (meny). |
|
The service used to calculate the distance between sender and recipient on an order.
If you have problems with incorrect distances, you can try clearing the cache by clicking on Help > Diagnostics > Clear distance cache so that the distances can be reloaded from the service. For more information, see Help (meny). |
|
|
Routing |
Opter uses PTV for route optimisation. You can disable the entire function by selecting [None]. For more information, see Route optimisation: preparation and configuration. |
|
Route optimisation (multiple vehicles) |
Opter uses PTV for route optimisation. You can disable the entire function by selecting [None]. For more information, see Route optimisation: preparation and configuration. |
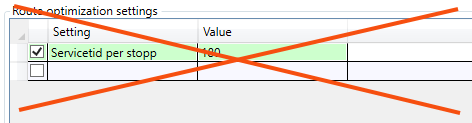
Route optimisation settings
It is only for internal Opter use, and should not be used. Even if a row is added and a value is entered in the table, such as "Service time per stop 180 seconds", it is not used in the route optimisation.
Road toll settings
Here you set which toll types Opter should automatically create toll items for, and whether the Price items should be displayed individually or grouped.
The settings can also be made in the Countries registry on the Road toll settings tab. It doesn't matter if you make the settings in the country register or in the office settings, basically the same data is changed. If you want to make the same settings for all countries, it is most efficient to make them here in the office settings. If you do not make any settings either here or in the country register, the default settings are used:
-
General road tolls (Type: GENERAL) are shown grouped by country.
-
All other road tolls are displayed individually, i.e. one price item row per road toll.
Instructions on how to set up Road tolls in Opter can be found at Administering road tolls.
Create a new row in the table for each setting you want to make.
|
Column |
Option |
|---|---|
|
Country |
Select which country the setting should apply to. [Any] = the setting applies to all countries. |
|
Type |
Select the toll type.
|
|
Management |
Choose how the Road tolls should be displayed on the item rows.
|
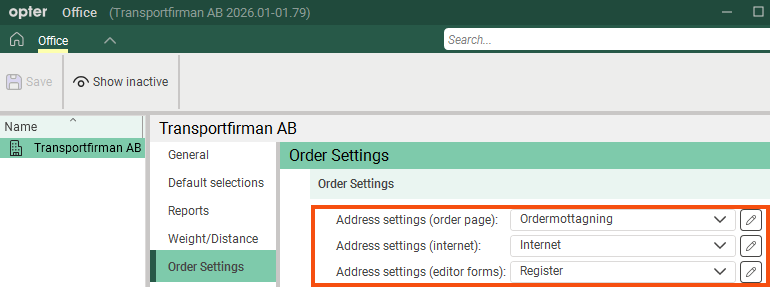
Order Settings
Order Settings
|
Function |
Description |
|---|---|
|
Address settings (order page) Address settings (editor forms) |
Select the address settings to be used as the default for the address groups in order reception and the registers.
If you want to change any address settings, click |
|
Separate "No fuel extra" for customer and resource |
For more information, see Separating the fuel extra setting for customer and resource. Database fields: OFF_SeparateNoFuelExtra |
Pricing
|
Function |
Description |
|---|---|
|
Currency |
The default (system) currency in which all invoices and supplier bills are issued unless specific settings have been made for customers or resources. Report tag (currency code): CUR_Code_Standard |
|
Create invoices with construction VAT separately |
Downplayed if the customer is not a construction company. See tab Invoice information in the customer register. |
Invoice payment
Payment information
|
Function |
Description |
|---|---|
|
No payment before |
Enter the earliest date that can be used as the payment date when recording payments. It is used to avoid including payments already processed in another system if you switch to Opter. If you try to register payments with a date earlier than the one you enter here, you will receive a message that the date is too early. On the Invoice settings tab, you can also set a date block for invoicing (date field No invoices before). |
Invoice settings
Use this tab to set up how invoicing will work. These are the basic settings for invoicing. Many of the settings can be overridden elsewhere, for example in the customer registry.
|
Function |
Description |
|---|---|
|
Invoice template scheme |
Select which invoice reports to use. Click on For more information, see Reports (window). To make an exception for a specific customer, set it up on the Invoice information tab in the Invoice design drop-down list in the customer registry. |
|
Fee |
Select the invoice fee. To make an exception for a specific customer, set it up at Register > Customers, on the Invoice information tab in the Fee drop-down list. |
|
Payment Condition |
Select the payment conditions. To make an exception for a specific customer, set it up at Register > Customers, on the Invoice information tab in the Payment condition drop-down list. |
|
Late payment interest rate |
Select the late payment interest rate from the drop-down list, for example 10%. To make an exception for a specific customer, set it up at Register > Customers, on the Invoice information tab in the Late payment interest rate drop-down list. |
|
To be invoiced |
Select the invoicing interval from the drop-down list, for example invoices every two weeks or monthly. To make an exception for a specific customer, set it up at Register > Customers, on the Invoice information tab in the To be invoiced drop-down list. |
|
Invoice type |
Collection invoice: one invoice per customer is created. One invoice per customer project: one invoice per customer project is created. One invoice per order: one invoice per order is created. To make an exception for a specific customer, set it up at Register > Customers, on the Invoice information tab in the Invoice type drop-down list. |
|
Invoicing mode |
One open period. Only one invoice period can be open at a time. The open invoice period must be closed before a new invoice period can be created. Multiple open invoicing periods. It is possible to have several invoice periods open at the same time. If several invoice periods are open at the same time, they must be closed in the same order as they were opened. Add to an open period. To be able to create invoices and add them to the existing open period in which there are already one or more invoices. |
|
Invoice number order |
Select the order in which invoice numbers are taken when invoices are created in an invoice period.
|
|
OCR-number type |
The method used to calculate and display OCR numbers on invoices. The OCR number is calculated from the invoice number. Report tag: INH_OCRNumber. You must agree with your bank that the OCR number is mandatory when paying invoices. |
|
Include length digit in OCR-number |
Only applies if you use the OCR number types Swedish or Svea KID. For other OCR number types, the length digit is set in the OCR number type window. A length digit is a single number that indicates how many digits the OCR number consists of, and is used to check that the OCR number is correct. Example:
|
|
Invoice export |
The invoice export group used by default. Exceptions can be made for a customer by selecting a different export group from the Invoice export setting drop-down list on the Invoice information tab of the customer registry. If [Default] is selected from that drop-down list, the export group selected here will be used. The default export group can also be set in the Invoice export settings window. For more information, see Invoice and settlement exports, overview. |
|
No invoices before |
Enter the earliest date that can be used as the invoice date when invoicing. This can be useful, for example, in order to lock a period of time. If you try to create invoices with an invoice date earlier than the one you enter here, you will receive a message that the invoice date is too early. The Invoice payment tab can also be used to set a date lock for payment registrations (the No payment before date field). |
|
Invoice prices include fuel extra Invoice prices include currency extra prices Invoice prices include delivery option prices |
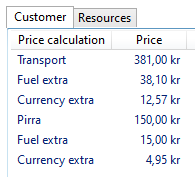
Controls whether or not fuel extra, currency surcharges and optional items are included in the total price of the order line on the invoice (i.e. included in the tag Price_Customer or not). As fuel extra and currency extra are integrated into the total price of the order row, it is not clear how much of the total price of the order row is fuel extra and currency extra. To make it clearer, you can show the total for fuel extra and currency surcharges on a separate line in the summary at the bottom of the invoice. For more information, see Fuel surcharge on invoices. The options are displayed on the order line as Price items (under <!-- Price Items --> in the report), but with Invoice prices include delivery option prices you choose whether or not to include the price of the option items in the total price on the order line (with or without fuel extra and currency surcharge), and whether or not to include the price of the option item in the total price on the item line (i.e. included in the tag TotalPrice_Customer).
An order with the following price rows will be displayed as below on the order row of the invoice.
|
|
Invoice negative price items as corrections |
|
|
Enable internal customers |
With this setting, the internal invoicing function can be turned on/off for all internal customers. If you have made specific account coding settings, they will still be there the next time you switch on the function. For more information, see Internal invoicing. |
|
Use current VAT rate for corrections |
|
|
Separate invoice numbers for regions |
It is only advisable to set up different invoice number series for different regions if you work with several different companies (legal entities) in the same Opter system. For more information, see Offices and regions.
|
|
Show from date as option when creating invoices |
|
|
Show account coding date as option when creating invoices |
|
|
Manual invoice date when create |
|
|
Include created interest on transport invoices |
For more information, see Late payment interest and reminder fee. |
|
Include created reminder fess on transport invoices |
For more information, see Late payment interest and reminder fee. |
|
Include attachments without a file category in invoice mailings |
Select the checkbox to allow attachments without a file category to be sent with invoices. If Include with invoice is
For more information, see Attachments (order reception). |


Dispatching
Use this tab to configure settings on how shipments should work in dispatch.
Contact Information
|
Function |
Description |
|---|---|
|
|
Email address for dispatch. |
|
Telephone number |
Telephone number, including country code. Example: “+460701234567”. If a phone number is entered here, drivers can call dispatch by tapping a button on the chat page in Opter Driver for iOS. For more information, see Chat or call the dispatch centre from Opter Driver. Database fields: OFF_PhoneNoDispatch |
Queue/schedule
For more information, see Activating and grouping the queue in dispatch.
|
Function |
Description |
|---|---|
|
Enable scheduled planning |
We recommend that this is not used. |
|
Enable container planning |
We recommend that this is not used. The checkbox and function will be deleted. |
|
Enable queue |
In dispatch it is possible to choose to display a queue of vehicles/resources that currently have no shipments. For more information, see Activating and grouping the queue in dispatch.
|
|
Group by vehicle type |
In order to group the queue by vehicle type, the primary resource must be vehicles, because employees do not have a vehicle type.
|
|
Group by zone |
For more information, see Activating and grouping the queue in dispatch.
|
|
Group by region |
|
|
Collection of geographic zones for queue |
If the Group by zone checkbox has been selected and a collection of geographical zones is to be used, this can be set in the Collection of geographic zones for queue drop-down list. For more information, see Activating and grouping the queue in dispatch and Geographic zone collections (window). |
Daily cleanup
|
Function |
Description |
|---|---|
|
Read messages |
Applies to chat messages from drivers. |
|
Completed shipments |
Completed shipments are shipments that have a status where the checkbox Include in daily cleanup is ticked. You can check the settings of the statuses in the window Life cycles. |
|
Shipments without POD |
Even if the shipment is completed, there may sometimes be no POD. Then you may want to keep those shipments in dispatch until the POD is registered. Give this setting a higher number than Completed shipments. Otherwise, they are removed when finalised regardless of whether they have a POD or not. |
|
All shipments |
All shipments are removed from the dispatch, regardless of their status. |
Dispatch
|
Function |
Description |
|---|---|
|
Lock consecutive shipments |
Example: If an order has three shipments with the status Assigned, it is not possible to set the second shipment to Picked up until the first has the status Delivered. And the third shipment cannot be set to Picked up until the second has the status Delivered.
|
|
Set details when splitting shipments |
|
|
Only load shipments for (selected) region in dispatch |
|
|
|
Select what happens to the precedence in dispatch when the space bar is pressed:
Dispatch needs to be restarted for the changes to take effect. |
|
Action for selected shipment if Enter/double click |
Choose what to do with the shipments in dispatch when Enter is pressed or a double-click is done:
You need to restart the dispatch for the change to take effect. |
Auto dispatch
Here it can be defined how routes are selected on orders that are auto dispatched.
|
Function |
Description |
|---|---|
|
Cost calculation |
Cost then arrival time: Opter prioritises the route with the lowest number of points. Arrival time then cost: Opter prioritises the route with the earliest arrival time. |
|
Number of days of scheduled routes to include |
The number of days ahead that Opter checks for suitable routes. Set this setting to "5". You have the Sundsvall-Luleå route once a week, on Wednesdays, with the latest departure time 10.00 am from the terminal in Sundsvall. A shipment with a last delivery time to the terminal in Sundsvall at 1.00 pm on Wednesday is then not automatically auto dispatched on that route because there are more than 5 days until the next departure time. Instead, Opter looks for another route that departs within 5 days. |
|
Auto dispatch depth |
Number of shipments into which an order is split for auto dispatch. |
|
Adjust shipment sharing pursuant to distance |
For more information and examples, see Split the revenue between the shipments on an order. |
|
Auto dispatch existing orders when changing service |
If the service on an order that has already been started is changed, shipments could be cancelled as they may disappear when the routes are changed.
|
|
Give auto dispatch points to line-haul when no pickup |
Some statistical reports may be misleading because they assume that there is a pickup shipment. If you have an order with four shipments (25% each) and you delete the first shipment, the 25% will be split between the two line shipments if the checkbox is selected (37.5% + 37.5% + 25%). If the checkbox is not selected, the 25% is divided equally between the remaining three shipments (33.3% + 33.3% + 33.4%). |
|
Give auto dispatch points to line haul when no delivery |
Some statistical reports may be misleading because they assume that there is a delivery shipment. If you have an order with four shipments (25% each) and you delete the last shipment, the 25% will be split between the two line shipments if the checkbox is selected (25% + 37.5% + 37,5%). If the checkbox is not selected, the 25% is divided equally between the remaining three shipments (33.3% + 33.3% + 33.4%). |
Internet
|
Function |
Description |
|---|---|
|
Link to Privacy Policy |
If you have your own privacy policy that you wish to link to on the web portals, please enter the full web address of the privacy policy here, for example “https://transportfirman.com/privacypolicy/”. The link appears on the page containing information about cookies, which you can access from the login page and the home page of the web portals.
|
|
Domains that are permitted to embed the web portals |
Here you specify websites authorised to embed the web portals in the format "https://www.exempel.com" (full URL). Several addresses are delimited by spaces, "https://www.exempel.com https://www.test.com". It is not possible to embed the web portals on another website if you are running HTTP. You must use HTTPS. See also |
|
Text in Track & Trace search field |
Prompt text displayed in the search field on Track & Trace, for example “Search by order number”.
|
|
Internet style sheet |
CSS file used to format the web portals. [None]: Opter's standard CSS is used. |
|
Validate EDI orders in order page |
|
|
Show link to Track & Trace on the login page |
Displays a link to Track & Trace on the login page of the web portals.
|
|
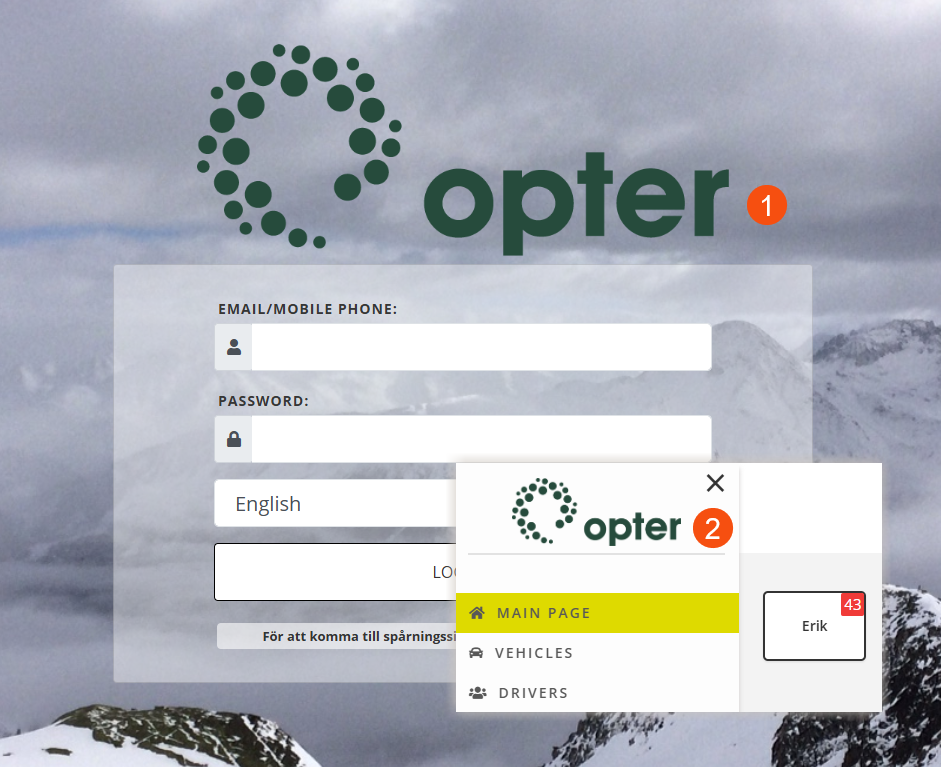
Internet image |
This image appears on the login page of the web portals (1) and in the top left corner above the menu (2). It can go well with your logo.
|
|
Background image for login page |
The background image of the web portals' login page and Track & Trace. Database fields: OFF_IMG_Id_BackgroundInternet |


Economy
Account coding
|
Function |
Description |
|---|---|
|
Use order region for account coding (both invoicing and supplier billing) |
In the first instance, the region is used on the shipments for account coding, but you can override this and use the region on the orders by ticking this option. For more information, see Account coding by region. |
|
Show the month from the order date in the account coding / invoice export |
The year and month of orders are included in the account coding for invoice exports of type XmlSerializer. This can be useful if you are accruing based on order date instead of invoice date. |
|
Show the month from the consignment in the account coding / invoice export |
The year and month of consignment orders are included in the account coding for invoice exports of type XmlSerializer. This can be useful if you invoice consignment orders and accrue based on the order date instead of the invoice date. |
|
Show the freight bill number from the consignment in the account coding / invoice export |
The consignment note number on the consignment order is included in the account coding for invoice exports of type XmlSerializer. |
Servers
On this tab, you configure an email account, for Opter emails, and the Pixie service, used for SMS notifications. For more information, see Sending emails from Opter and Activating the Pixie SMS service.
|
Function |
Description |
|---|---|
|
SMTP-server |
The server address the email service or internet service provider uses for outgoing messages, e.g. “smtp.office365.com”. |
|
Test email |
Opens a dialogue box where the email account can be tested. |
|
Port |
Port for outgoing email on the SMTP server, usually 587. |
|
Username |
User ID for email account. Usually the same as the email address. |
|
Password Show password |
Password for the email account. Can be displayed in plain text. |
|
Secure connection (SSL) |
|
|
Ms Graph Tenant ID |
If you use Microsoft 365 as your email service, you need to register Opter in Azure and then enter Directory (tenant) ID from Azure here. For more information, see Sending emails from Opter using Microsoft 365. If there is a value in this field, it does not matter if the fields above on this tab are filled in (SMTP-server, Port, Username, Password and Secure connection (SSL)). This information is not used, as the authentication is done through the app registration in Azure. It can be a good idea to remove the information in them, so that there is no risk of misunderstanding. |
|
Ms Graph Client ID |
If you use Microsoft 365 as your email service, you need to register Opter in Azure and then enter Application (client) ID from Azure here. For more information, see Sending emails from Opter using Microsoft 365. |
|
Ms Graph Client Secret |
If you use Microsoft 365 as your email service, you need to register Opter in Azure and then enter the Azure client secret value here. The client secret is only shown when you register Opter in Azure and cannot be found out afterwards. Therefore, when registering Opter in Azure, make sure to copy the secret. For more information, see Sending emails from Opter using Microsoft 365. |
|
Log messages |
Messages sent using the above email account are stored in Opter and can be retrieved by clicking on Search email, much like the sent mail folder in Outlook. If the messages are not logged, it is not possible to see which messages have been sent from Opter. |
|
Search email |
Opens a window in which searches can be carried out on emails sent from Opter. |
|
SMS sender |
What is shown as the sender of the SMS notifications. A maximum of 11 characters, A–Z, a–z and 0–9. Dimmed if Use Http SMS is deselected. |
|
Default country calling codes |
Country code in the format "+46", "46" or "0046". Used if a country code is not already included in the telephone number to which the notification is sent. Dimmed if Use Http SMS is deselected. |
|
SMS Id |
User name for the Pixie service if you use the old Pixie system. Dimmed if Use Http SMS is deselected. |
|
SMS password |
Password to your Pixie account if you are using Pixie's old platform, or API key if you are using Pixie's new platform. The API key can be found in your Pixie account. For more information, see Activating the Pixie SMS service. |
|
Do not send SMS notifications before + Do not send SMS notifications after |
The times between which automatic SMS notifications may be sent, for example from "8:00" (Do not send SMS notifications before) to "21:00" (Do not send SMS notifications after). Can be overridden for individual services. For more information, see Setting the time interval for automatic SMS notifications. Dimmed if Use Http SMS is deselected.
|
|
Use Http SMS |
|
|
Use Pixie’s new platform |
Pixie's new platform is used to send SMS. For more information, see Activating the Pixie SMS service and on the Pixie website. |
|
Test SMS |
Opens a dialogue box where the Pixie service can be tested. |
|
Server settings are moved to system (click here to open) |
Opens the System Settings window. |
Scanning
This tab can be used to configure certain settings for scanning, such as whether the system should check that the location of the scan is correct and whether a new order should be created if an unknown freight bill number is scanned.
Scanning
|
Function |
Description |
|---|---|
|
Time limit to consider a package missing (minutes) |
A package is reckoned to be missing if the other packages on the same order have progressed further, such as having arrived at the next terminal. To avoid a warning about this being issued by the Missing packages column in dispatch, order and consignment check during the time it takes to scan all the order packages, enter a number of minutes delay here. |
|
Terminal work timeout |
If the Create a new order when scanning missing packages function is used, a new order is created if a missing package arrives at a terminal after the other packages on the order have departed. To avoid this happening by mistake when the other packages have already had a departure scan, but loading work is still in progress, set a few minutes delay here. |
|
Create new order when scanning unknown freight bill number |
In the field below it is possible to specify which customer to use when creating new orders from unknown freight bill numbers.
|
| Customer for order created when scanning unknown freight bill number
|
Enter the customer to be used when new orders are automatically created when scanning unknown packages. Dimmed if Create new order when scanning unknown freight bill number is deselected. |
|
Consolidation type upon arrival scan |
Enter the consolidation type to be used if the Consolidate at arrival scan function is used. For more information, see Consolidating upon arrival scanning at a terminal and Consolidating orders. |
|
Create a new order when scanning missing packages |
A number of minutes of delay can be set in the Terminal work timeout field above.
|
|
Update status and resource when freight bill scanning, even if the relevant status has been reached |
|
|
No checking of location when scanning |
Example: an order goes from the sender to terminal 1, then to terminal 2, and then to the receiver. If a package or freight bill on the order has undergone arrival and departure scanning at terminal 1 and then at terminal 2, and then undergone arrival scanning at terminal 1 again, the scan is approved in Opter Driver/Opter Terminal. However, the status of the shipment does not change even though the shipment is now back at an earlier position in the order chain.
|
|
Split order on arrival/departure scan at unexpected terminal |
|
|
Logon as terminal in Opter Terminal |
Choose whether users should log in as terminals or with personal user accounts:
For more information, see Installing Opter Terminal for Android. |
|
Do not reset order date on status change |
Also make sure that the Reset order date upon scanning checkbox in the order settings on the Template tab has the desired setting for new orders. For more information, see Order entry settings (window). |
|
Block delivery scan if the shipment is not allocated to the resource |
This setting only applies to the last shipment on the order.
The setting does not prevent incorrect use of delivery scanning. For example, if an order has two shipments, and the same resource is on both shipments, she or he can delivery scan the entire order when the first shipment is scanned at the terminal.
|
|
Use the Weight Correction function if the weight is changed in Opter Terminal |
For more information, see Weight correction and Changing package dimensions in Opter Terminal. |
Status
|
Function |
Description |
|---|---|
|
Warn if other resource when departure scan from status (inclusive) |
Applies to departure scan at terminal. If you want the resource (driver/vehicle) to be given a warning in Opter Driver if a departure scan is done on something that is associated with a different resource’s shipment, select the status from which the warning should be shown, for example Assigned. The default setting is Picked up. It is possible to make exceptions to the general setting. To make exceptions for certain vehicles, click on Register > Vehicles, then on the Mobile/web tab, and make the desired setting in the Scanning box. To make exceptions for certain drivers, click on Register > Employees, then on the Mobile/web tab, and make the desired setting in the Scanning box. For more information, see Block or warn about another resource when scanning in Opter Driver. |
|
Warn if other resource when pickup scan from status (inclusive) |
Applies to pickup scanning at the sender. If you want the resource (driver/vehicle) to be given a warning in Opter Driver if a pickup scan is done on something that is associated with a different resource’s shipment, select the status from which the warning should be shown, for example Assigned. The default setting is Picked up. It is possible to make exceptions to the general setting. To make exceptions for certain vehicles, click on Register > Vehicles, then on the Mobile/web tab, and make the desired setting in the Scanning box. To make exceptions for certain drivers, click on Register > Employees, then on the Mobile/web tab, and make the desired setting in the Scanning box. For more information, see Block or warn about another resource when scanning in Opter Driver. |
|
Block change of status/resource if other resource when departure scanning from following status (inclusive) |
Applies to departure scan at terminal. If only the resource (driver/vehicle) who was assigned the shipment should be able to make changes to the status or resource in Opter Driver during departure scanning, select the status from which the block applies, for example Assigned. The default setting is Picked up. It is possible to make exceptions to the general setting. To make exceptions for certain vehicles, click on Register > Vehicles, then on the Mobile/web tab, and make the desired setting in the Scanning box. To make exceptions for certain drivers, click on Register > Employees, then on the Mobile/web tab, and make the desired setting in the Scanning box. For more information, see Block or warn about another resource when scanning in Opter Driver. |
|
Block change of status/resource if other resource when pickup scanning from following status (inclusive) |
Applies to pickup scanning at the sender. If only the resource (driver/vehicle) who was assigned the shipment should be able to make changes to the status or resource in Opter Driver during pickup scanning, select the status from which the block applies, for example Assigned. The default setting is Picked up. It is possible to make exceptions to the general setting. To make exceptions for certain vehicles, click on Register > Vehicles, then on the Mobile/web tab, and make the desired setting in the Scanning box. To make exceptions for certain drivers, click on Register > Employees, then on the Mobile/web tab, and make the desired setting in the Scanning box. For more information, see Block or warn about another resource when scanning in Opter Driver. |
|
Set status with final delivery scan of package label |
This setting is not recommended as the status is set to Delivered/Delivered before the driver has filled in the pod in Opter Driver.
|
|
Set status with final delivery scan of freight bill |
This setting is not recommended as the status is set to Delivered/Delivered before the driver has filled in the pod in Opter Driver.
|