Installing Opter Terminal for Android
Last updated: 17 June 2026
In this article
The installation and configuration of the app is done in the following steps:
-
Install the app.
-
Configure the app (via a QR code or a link from Opter on the computer).
-
Choose how users will log in.
-
Create login credentials.
Step 1: Install the app
Opter Terminal requires Android 5.0 or later. To see which Android version a phone is running, tap Settings > About your phone > Software information.
-
Open Google Play Store on your mobile phone.
-
Search for “Opter Terminal” and install the app with that name.
Step 2: Configure the app
-
Open Opter on a computer.
-
Click on QR codes and links for our apps on the left.
-
Open the app on your mobile and scan the QR code.
You can send the link displayed in Opter on your computer to the person who will configure the app. That person can then tap the link on their mobile phone.
To ensure the times of shipments are displayed correctly in the app, the correct time zone must be set. Press Settings > General management > Date and time and activate Automatic date and time. The time zone in Sweden is GMT+01:00 Central European Time.
You can check here whether the app will work with your certificate: androidcertificatecheck.Opter.cloud.
Step 3: Choose whether users should log in as terminals or with personal user accounts
Users can log in either as a terminal or with a personal user account. A personal user account provides better traceability, but on the other hand a user account has to be created for each terminal employee at all the terminals in that case.
-
Click on Settings > Offices > Scanning tab.
-
Select the Logon as terminal in Opter Terminal checkbox if users should log in as terminals. If this checkbox is not selected, users log in with personal user accounts.
If you choose to have users log in with personal user accounts, they will be asked at which terminal they are scanning when they open the app.
Step 4: Create login credentials
Depending on the user login procedure adopted in step 3 above, login credentials are created for terminals or personal user accounts.
-
Click on Register > Terminals.
-
Select a terminal in the list on the left and go to the Mobile/web tab.
-
Enter a username and click on Change password to create a password that the resource will use to log in to Opter Terminal. The checkbox Log in as terminal in Opter Terminal (office setting) is for information only and cannot be ticked or unticked here, it is done on the Scanning tab in the office settings (Logon as terminal in Opter Terminal).
-
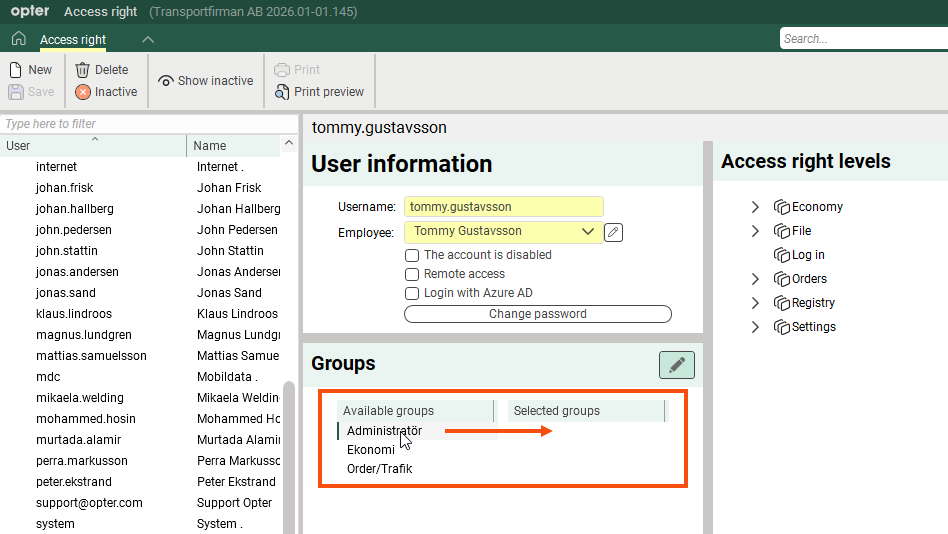
Click on Settings > Access rights.
-
Click on New in the toolbar to create a new user account.
-
Enter a user name. The username can contain the characters 0-9, a-z and A-Z. So no Å, Ä and Ö, spaces, colons or quotation marks, but full stops are fine.
Have a pattern for usernames so that they are easy to remember and easy to manage, for example first and last names with a full stop in between.
-
Select which employee is to be connected to the user account in the Employee drop-down list.
If the desired person is not listed as an employee, they can be added by clicking on
 next to the drop-down list. Once you have done this, however, you must close the Access right window for the new employee to appear in the list. Save the changes temporarily under a different employee, close and reopen the window, then switch to the correct employee once you have added them.
 -
If you have Opter Cloud, tick the box Remote access. If it is not selected, the user cannot log into Opter.
-
Save the user account details, then click Change password, enter the password the user will use to log in in both fields, and click Ok. We recommend the use of “strong” passwords.
The password is case sensitive. If you create the password "Password", users must log in with "Password", "password" does not work.
If you have Opter Cloud, your password must be at least 8 characters long and contain at least one uppercase letter, one lowercase letter, one number and one special character (!@#$%^&*?_~-().,).
-
GIF the user the authorisation they should have either by double-clicking on any of the groups under Available groups to move it to Groups selected, or by right-clicking on individual functions in the tree structure on the right and selecting an authorisation. For more information about access rights, see Setting access rights for users.
-
It is possible to save the user account without specifying any access rights, but the user cannot then log in to Opter.
-
The passwords are encrypted and Opter cannot access them. If a user forgets their password, you must create a new one by clicking on Change password.