Extra dimensions and extra IDs in Opter Driver
Last updated: 11 November 2025
Applies to Opter Driver for iOS and Opter Driver Labs for Android version 2.4.27 and later.
For version 2.4.26 and earlier, the names you give to extra dimensions and extra IDs are only displayed in the Changes view.
In the mission list and in the detail view, the names "Extra dimension 1" - "Extra dimension 5" and "Extra ID 1" - "Extra ID 5" are displayed, making it difficult for the driver to know what information is in those fields. We recommend that all drivers update to the latest version of the app.
In this article
If you use extra dimensions and extra IDs, you can set the names displayed in Opter Driver for Extra dimension 1–Extra dimension 5 and Extra ID 1–Extra ID 5. For example, if you use Extra ID 2 for "Container ID", you can set the mobile data setting SHI_ExtraId2Name to "Container ID". Then "Container ID" will be displayed instead of "Extra ID 2" in Opter Driver.
Naming extra dimensions and extra IDs in Opter Driver
Use the Mobile data settings SHI_ExtraDimension1Name-SHI_ExtraDimension5Name and SHI_ExtraId1Name-SHI_ExtraId5Name to name the fields Extra dimension 1-Extra dimension 5 and Extra ID 1-Extra ID 5 in Opter Driver.
Proceed as follows
-
Click on Settings > Mobile data > Settings mobile data.
-
For example, if SHI_ExtraDimension1Name or SHI_ExtraId1Name are not already listed, click on an empty row in the Name column and then on the down arrow in the row being added. Select SHI_ExtraDimension1Name or SHI_ExtraId1Name from the list.
-
In the column Value, enter the name to be displayed in the app instead of SHI_ExtraDimension1Name or SHI_ExtraId1Name, for example "Container ID".
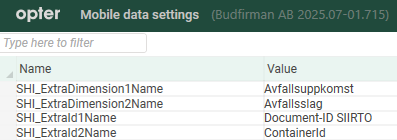
For example, in the image above, we have set the "Container ID" to appear in the Opter Driver instead of "Extra ID 2" and the "Document ID SIIRTO" to appear instead of "Extra ID 1".
-
Click on Save at the bottom of the Mobile data settings window.
Drivers must log out and then log back into Opter Driver to see the changes.
The images below show how it might look in the detail view and the Changes view in Opter Driver after we have named:
-
Extra ID 1 (SHI_ExtraId1Name set to "Document-ID SIIRTO").
-
Extra ID 2 (SHI_ExtraId2Name set to "Container ID").
-
Extra dimension 1 (SHI_ExtraDimension1Name set to "Waste Generation").
-
Extra dimension 2 (SHI_ExtraDimension2Name set to "Waste type").
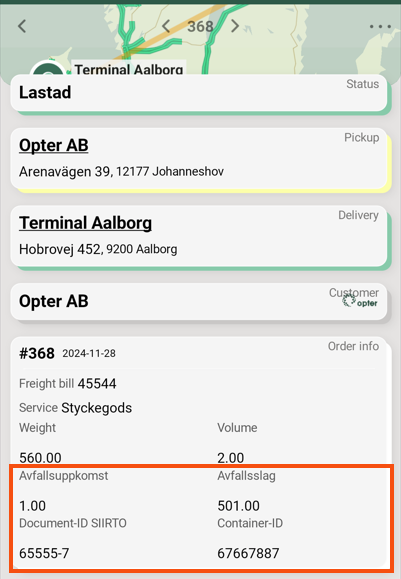
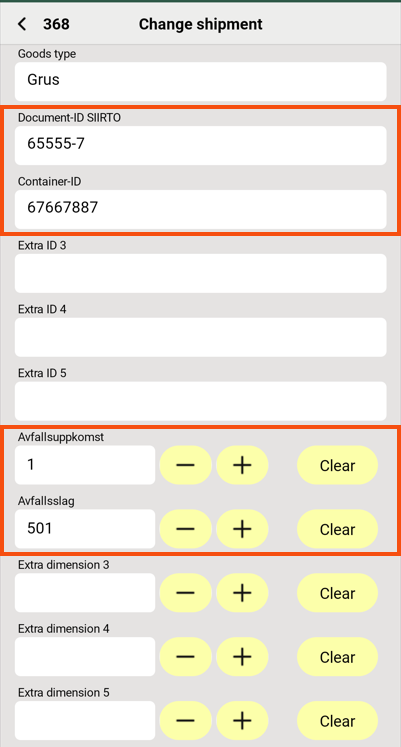
The images above show how it might look in the detail view and the Changes view, but the same is true for the mission list, etc.
$Design_EXTRADIMENSION1-5 and $Design_EXTRAID1-5
As of version 2.4.27, it works like this:
-
If you name SHI_ExtraDimension1Name, then $Design_EXTRADIMENSION1 is also automatically given the same name.
Also applies to SHI_ExtraDimension2Name-SHI_ExtraDimension5Name, then $Design_EXTRADIMENSION2-$Design_EXTRADIMENSION5 will automatically have the same name.
-
If you name SHI_ExtraId1Name, then $Design_EXTRAID1 is also automatically given the same name.
Also applies to SHI_ExtraId2Name-SHI_ExtraId5Name, then $Design_EXTRAID2-$Design_EXTRAID5 is automatically given the same name.
For more information, see Text tags in App.OpterDriver.Design.
Extra dimensions and extra IDs in Order reception
To name and display the fields Extra dimension 1–Extra dimension 5 and Extra ID 1–Extra ID 5 in the order reception, do the following:
-
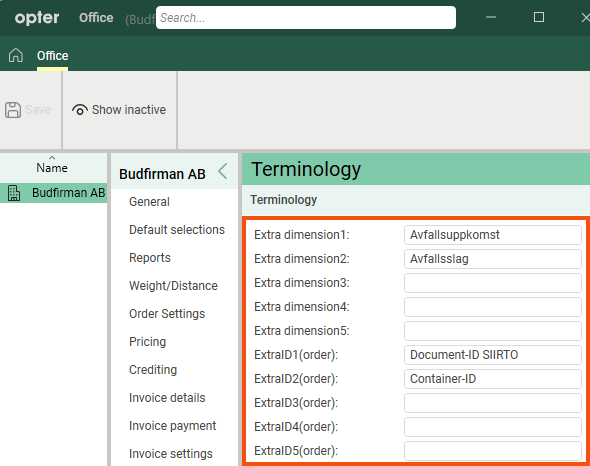
In Opter, click Settings > Offices > Terminology.
-
Name the fields you want to use.
The image below shows the fields Extra dimension1-Extra dimension5 and ExtraID1(order)-ExtraID5(order). Some of the fields have been renamed.
-
Click on Save to save all changes.
-
Click Settings > Order reception > Order settings and the tab Form flow.
-
Search for, for example, Extra ID1 or Extra dimension1 and tick the box in the column Visible.
Once you have saved the changes, the fields will appear:
-
Extra ID1–Extra ID5 (those that should be visible) in group Data in the order reception area.
-
Extra dimension1-Extra dimension5 (those that should be visible) in the group Dimensions in the Order reception.
-
-
Click on Save to save all changes.
Troubleshooting
-
If one or more fields are not displayed in Opter Driver:
-
In Changes view:
Check that the Mobile data settings for SHI_ExtraDimension1Permission-SHI_ExtraDimension5Permission and SHI_ExtraId1Permission-SHI_ExtraId5Permission are set to "True" (default). For example, if SHI_ExtraId2Permission is set to "False", the field Extra ID 2 (neither with its default name nor with its new name) is not displayed. For more information, see Mobile data settings (window) and Changes to orders in Opter Driver.
-
In the shipment list and in the shipment detail view:
Check that you have selected the fields to be displayed in the window Design field for mobile, App.OpterDriver.Design or App.Design (depending on which of these three you are using). For more information, see Setting which fields are displayed in Opter Driver.
-