Subcontractors (window)
Last updated: 27 April 2026
![]() Register > Subcontractors
Register > Subcontractors
In this article
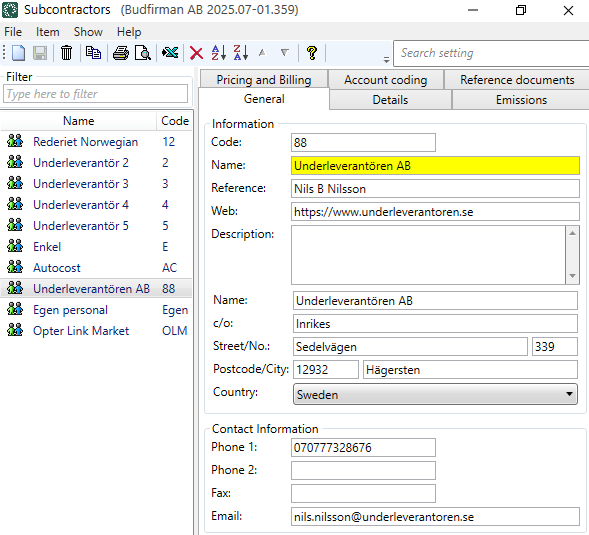
In this window, you register your subcontractors and manage their properties.
The concepts of haulier and subcontractor are described in Carriers and subcontractors, overview.
For instructions, see Adding a new subcontractor.
Some of the information you enter for the subcontractor on the tabs General, Details and Pricing and Billing is sent in the settlement export to Fortnox. For more information, see Supplier bill export to Fortnox.
General
Information
|
Function |
Description |
|---|---|
|
Code |
The call number of the subcontractor. Used in dispatch, among other things. |
|
Name |
Enter the subcontractor’s name as you would like it to appear in dispatch, for example. |
|
Reference |
Contact person at the subcontractor. |
|
Web |
The address of the subcontractor's website. For example, ‘https://www.subcontractor.se’. |
|
Description |
Free text field for internal notes. The description is not displayed anywhere else but here. |
|
Name |
Company name of the subcontractor. |
|
c/o |
Enter the department of the company if you wish. |
|
Street/No |
The street name and number of the subcontractor's address. |
|
Zip code/City |
Postcode and postcode of the subcontractor's address. |
|
Country |
Select the country for the subcontractor's address. |
Contact Information
|
Function |
Description |
|---|---|
|
Phone 1 Phone 2 |
Telephone number of the subcontractor. |
|
Fax |
Fax number if applicable. |
|
|
Used to send out shipment notifications. If you select Send notification upon assignment (email) on the Details tab, you must enter an e-mail address here. For more information, see Email notifications of shipments to subcontractors. If you want to send supplier bills to a different e-mail address, enter the alternative address in the Pricing and Billing tab. |
Details
Details
|
Function |
Description |
|---|---|
|
Corporate ID number |
Enter the Corporate ID number of the subcontractor. |
|
VAT registration number |
Enter the subcontractor's VAT registration number (VAT number). |
|
VAT reg. until |
Only applies to Norwegian companies that have to withhold VAT for start-ups they hire. If the subcontractor has withheld VAT, indicate the date until which you will withhold the VAT. See also the checkbox Withhold VAT on the tab Pricing and Billing. |
|
Choose whether the subcontractor should be able to see prices, and if so, whether they should be able to see earned, collected and/or percentage. If you click on See also the subcontractor web tick box Show prices. (Click on Settings > Internet > Internet order settings, select the subcontractor web in the list on the left. On the tab General in the box Settings you will find the checkbox Show prices.) For more information, see Internet order settings (window). |
|
|
Internet order settings |
The internet order settings determine what the subcontractor can see and do on the subcontractor web. For more information, see Internet order settings (window). |
|
Internet order customer |
If the subcontractor is to be able to place orders via the web portal, you must select a customer here. The online customer is listed as the customer on all orders created by the subcontractor. The subcontractor cannot therefore choose which customer is to be named on the order. The customer's name is displayed on the subcontractor web. Click on |
|
Starting date |
Enter the start date for when the subcontractor starts working for you. |
|
Send notification upon assignment (email) |
An email is sent every time a shipment is assigned to the subcontractor. The email address used is the one you entered in the Email field on the General tab. For more information, see Email notifications of shipments to subcontractors. |
|
Attach freight bill |
This checkbox can only be used if you have selected Send notification upon assignment (email) above.
|
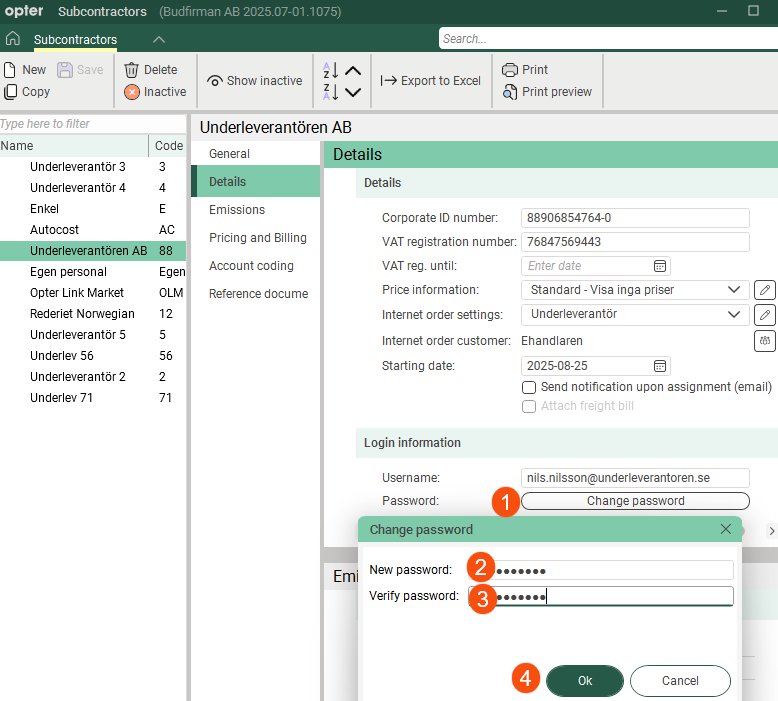
Here you can create a user account if you want the subcontractor to be able to log in to the subcontractor web.
|
Function |
Description |
|---|---|
|
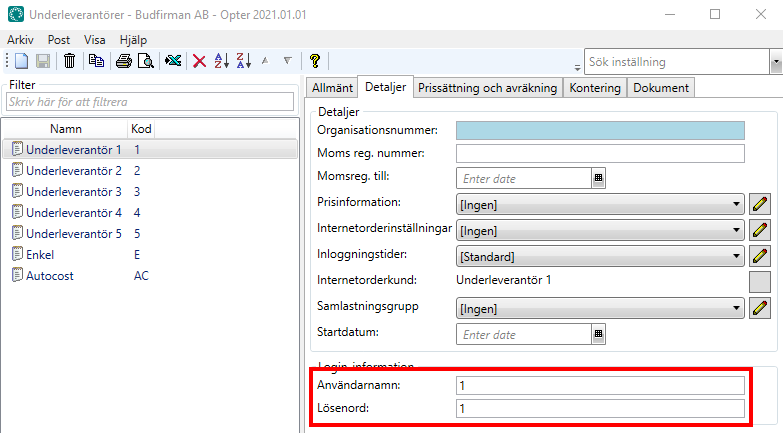
Username |
Username for logging in to the subcontractor web. For more information, see, Subcontractor web user accounts and Introduction to the subcontractor web. |
|
Password |
Password for logging in to the subcontractor web.
For more information, see Subcontractor web user accounts and Introduction to the subcontractor web. |
Emissions
On this tab, you make settings so that Opter can calculate CO2 emissions.
The possibility to enter CO2 emissions data (e.g. fuel and fuel consumption) in the subcontractor register is available in Opter version 2025.12.00 and later. In previous versions of Opter, the CO2 emission calculation is based on the price vehicle type if the shipment is subcontracted.
For more information, see CO2 emissions, overview, Settings for CO2 emission calculations and This is how Opter calculates CO2 emissions.
CO2 emissions
|
Function |
Description |
|---|---|
|
CO2 emissions (g/km) |
Enter CO2 emissions in grams per km for the subcontractor's vehicle. If you enter Fuel, Fuel consumption (per 100 km) and CO2 emissions (g/km), Opter will use the value in the CO2 emissions (g/km) field to calculate CO2 emissions for shipments and orders. If you want Opter to calculate the CO2 emissions (in g/km) of the subcontractor's vehicle, leave the field CO2 emissions (g/km) empty and fill in the fields Fuel and Fuel consumption (per 100 km). The CO2 emissions data are taken primarily from the subcontractor register and secondarily from the price vehicle type. This means that if you do not enter any CO2 emissions data for the subcontractor, Opter will retrieve the data from the price vehicle type instead. For more information, see Settings for CO2 emission calculations and This is how Opter calculates CO2 emissions. |
|
Fuel |
Indicate the type of fuel used by the subcontractor's vehicle, for example diesel. The CO2 emissions of the fuel must be entered in the fuel register. For more information, see Settings for CO2 emission calculations. |
|
Fuel consumption (per 100 km) |
Indicate the average fuel consumption in the selected unit per 100 km of the subcontractor's vehicle. The unit is set in the fuel registry. Example: 2.5 litres per mile = 25 litres/100 km. If you enter Fuel, Fuel consumption (per 100 km) and CO2 emissions (g/km), Opter will use the value in the CO2 emissions (g/km) field to calculate CO2 emissions for shipments and orders. If you want Opter to calculate the CO2 emissions (in g/km) of the subcontractor's vehicle, leave the field CO2 emissions (g/km) empty and fill in the fields Fuel and Fuel consumption (per 100 km). The CO2 emissions data are taken primarily from the subcontractor register and secondarily from the price vehicle type. This means that if you do not enter any CO2 emissions data for the subcontractor, Opter will retrieve the data from the price vehicle type instead. For more information, see Settings for CO2 emission calculations and This is how Opter calculates CO2 emissions. |
|
Capacity converted into pricing weight (kg) |
This field is used if you want to take into account the pricing weight of the order compared to the capacity of the subcontractor's vehicle. If the shipment is allocated to a subcontractor, the information on Capacity converted into pricing weight (kg) is firstly taken from the subcontractor register and secondly from the price vehicle type when calculating CO2 emissions for the shipment and order. For more information, see Settings for CO2 emission calculations. |
Pricing and Billing
Pricing
|
Function |
Description |
|---|---|
|
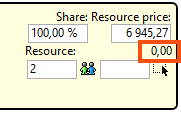
Choose resource pricing. You can also add new or modify existing resource prices by clicking on [None] means that no cost is generated, even if a manual cost is added to the shipment.
[None] means, therefore:
|
|
|
Fuel extra |
Select the fuel surcharge to be paid to the subcontractor. For more information, see Fuel surcharge (fuel extra), overview and Selecting the fuel extra for a subcontractor or supplier. Only valid if the checkbox No fuel extra (below) is unticked. |
|
No fuel extra |
Choose whether the subcontractor should receive a fuel surcharge or not.
|
|
Create cost price items automatically |
For more information, see Receiving invoices from subcontractors and suppliers, Settings for receiving invoices and tracking costs and Adding new cost price items to cost check.
|
Billing
|
Function |
Description |
|---|---|
|
Crediting interval |
Select the settlement interval, e.g. monthly. If you want to add a new settlement interval or modify an existing settlement interval, click on For more information, see Create Supplier Bills (window). |
|
Supplier bill export |
Select the settlement export, e.g. Fortnox or Talenom. |
|
Sales ledger number |
The sales ledger number for the subcontractor is sent with the invoice export to Visma e-conomic, for example. |
|
Supplier bill design |
Select the design of the supplier bills. For more information, see Reports (window). |
|
You can pay your hauliers and subcontractors in two different ways in Opter. You can credit the cost to them, or they can bill you. For more information, see Receiving invoices from subcontractors and suppliers.
|
|
|
Withhold VAT |
Only applies to Norwegian companies that have to withhold VAT for start-ups they hire. The checkbox setting is available for printing on the settlement note and for exporting settlement information to accounting systems.
There is no automatic deduction of VAT, so you have to keep track of this yourself (using the checkbox). See also VAT reg. until under the tab Details.
|
|
Do not send supplier bill via Opter Link |
|
|
Email supplier bill export |
Enter the email address to which supplier bills should be sent. If you do not enter an e-mail address here, the supplier bills will be sent to the same address as the shipment notifications (e-mail address on the General tab). Applies only to settlement exports of the types PDF, XmlSerializer and Fortnox. |
|
VAT Account number |
Account number for VAT. |
|
The subcontractor's bank account number. If you export supplier bills to Fortnox, Opter will retrieve the bank account number from this field and send it to Fortnox. It is important that you enter the bank account number and any clearing number in the correct format in this field. For more information, see Supplier bill export to Fortnox. |
|
|
AccountNo BG |
The subcontractor's bankgiro number. |
|
Plus giro account number |
The subcontractor's plusgiro number. |
|
IBAN |
IBAN, i.e. international bank account number. |
|
BIC/SWIFT |
BIC/SWIFT. |
|
Payment Condition |
Select payment terms. For more information, see Payment Condition (window). |
|
Currency |
Enter the currency of the subcontractor. If you have subcontractors in other countries, you can make it easier for them by crediting them in their currency. For more information, see Currencies and Currencies (window). |
Account coding
Account coding
In Opter, the VAT rate on the order determines the income and cost account to which a certain amount is booked. On this tab you can make exceptions to the regular account coding. The tabs you make changes to are marked with ![]() .
.
Click on ![]() to display the VAT rates held in the system. Then select the account to which amounts with the different VAT rates should be posted. More information on the individual drop-down lists can be found at The Account coding tab. The settings in this tab apply if you reach item 4 in the list in How Opter selects accounts for income and expenses. If [Default] is selected for any of the options here, the account coding is taken from the VAT rate.
to display the VAT rates held in the system. Then select the account to which amounts with the different VAT rates should be posted. More information on the individual drop-down lists can be found at The Account coding tab. The settings in this tab apply if you reach item 4 in the list in How Opter selects accounts for income and expenses. If [Default] is selected for any of the options here, the account coding is taken from the VAT rate.
For more information on how Opter selects the VAT rate on orders (column Sales) and supplier bills (column Cost), see How Opter chooses the VAT rate for customer invoices and How Opter chooses the VAT rate on credits.
Options
In the Options box, tick the options that the subcontractor's vehicle has, e.g. refrigeration. The options you tick will not appear anywhere else except here in the subcontracting register.
The options shown here in the subcontracting register are added in the window Options. For more information, see Options and Options (window). The options displayed in the subcontractor register are those that have the checkbox Available for subcontractors ticked in the window Options.
(The options have nothing to do with account coding, but they are located under the tab Account coding.)
Reference documents
On the Reference documents tab, files that can be opened on other computers can be added. The files that are added are not attached to orders, instead the function works as a file server and is intended for exchanging information. The files are saved in the database.
|
Function |
Description |
|---|---|
|
New |
Adds a file that is on the computer. It is only possible to add one file at a time. |
|
Delete |
Deletes files from the registry. It is only possible to delete one file at a time. |
|
Open |
Opens the selected file in the list. |
|
File name (column) |
The file name. |
|
Created |
When the file was added as a document in Opter. |
|
File name (field) |
The file name of the selected file. You can rename the file by typing the new name and clicking Save on the menu. Remember to keep the same file extension (for example “.docx”), otherwise the application to use has to be selected when the file is opened. |
|
Comment |
Free text. Information about the file. The information is only shown here. |