Opter 2025.06.00
Last updated: 24 September 2025
In this article
Opter Cloud – login
If you use Opter’s cloud solution, all user accounts must have a strong password. The password must consist of at least 8 characters and contain at least one uppercase letter, one lowercase letter, one number and one special character (!@#$%^&*?~-().,), for example “Opter2025#”.
Make sure your own password is strong before you receive the update. You can update your password under Settings > Access rights. If any user is unable to log in after the update, you can change that user’s password.

More information:
Email – Microsoft 365
Microsoft is introducing a more secure form of authentication for email accounts in Microsoft 365, and from September onwards, it will no longer be possible to log in using the old method. If you use Microsoft 365 as your email service, you must register Opter as an app in Azure and change the settings in Opter so that emails are sent via the Microsoft Graph API instead. App registration and configuration are carried out using a PowerShell script. The reason the script cannot be run as part of the update is that the person running it must have the correct permissions.
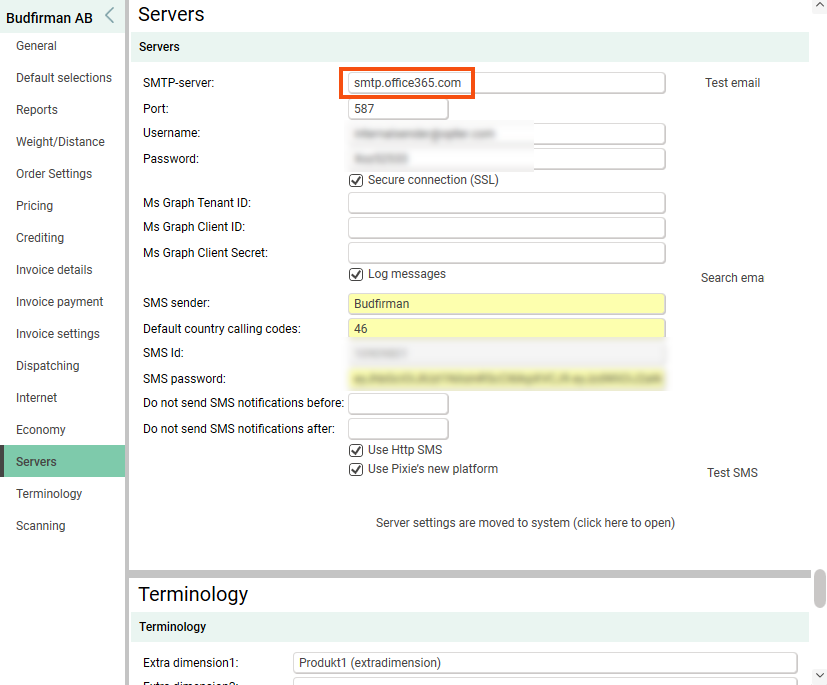
You can check whether you are using Microsoft 365 as your email service in the office settings. If the field SMTP-server on the Servers tab shows “smtp.office365.com” or “smtp-legacy.office365.com”, you are using Microsoft 365.
More information:
API
The information contained in the registers for vehicles, suppliers and subcontractors is now available via the API. See ‘Vehicles’, ‘Suppliers’ and ‘Subcontractors’ in the Swagger documentation.
New fields in the statistics API:
- Manual price on the order, ManualPrice in class Statistics.Delivery (includeDeliveries).
- The name of the EDI connection for EDI orders, Name in class Statistics.Delivery (includeDeliveries).
- Information on whether the order is a consolidation order, CombinationOrder in class Statistics.Delivery (includeDeliveries).
- The number of the consolidation order, Id_Combination in class Statistics.Delivery (includeDeliveries).
- Active options on the order, deliveryId, Name and Code in class Statistics.DeliveryOption (includeDeliveries).
- Resource price on the shipment, ManualResourcePrice in class Statistics.Shipment (includeShipments).
- Sales ledger number from the customer register, CustomerNumber in the class Customer (includeCustomers).
More information:
-
Swagger, if you’re using the cloud:
https://<YOUR company name><COUNTRY>.opter.cloud/api/index.html?urls.primaryName=Opter+API+v1
Example: https://budfirmanse.opter.cloud/api/index.html?urls.primaryName=Opter+API+v1
-
Swagger if you’re running on-premises:
https://<YOUR company name or IP address>.<COUNTRY>/api/index.html?urls.primaryName=Opter+API+v1
Exempel: https://budfirman.se/api/index.html?urls.primaryName=Opter+API+v1
Web portals
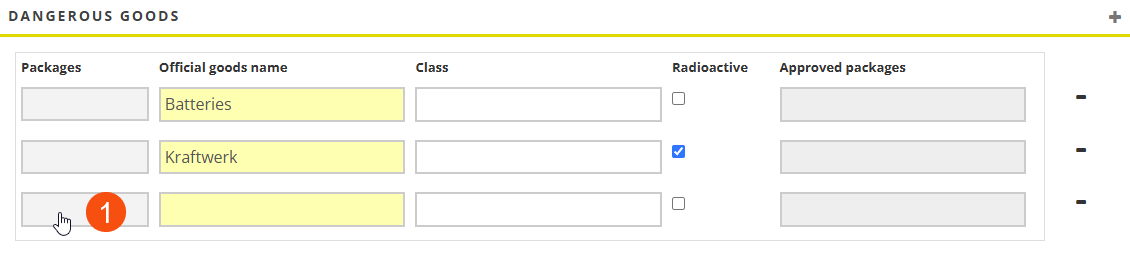
It is now possible to declare dangerous goods at parcel level in the order form on the web portals. Add Dangerous goods (group) to the Fields on the order page tab in the internet order setting.
More information:
Other news
 Fortnox service account (2025.06.85)
If you wish to simplify the process of assigning permissions, you can grant standard users limited permissions, and create a service account, granting that account only the permissions required to export invoices and supplier bills to Fortnox and import payments into Opter (from Fortnox).
When standard users then export invoices or supplier bills to Fortnox or import payments into Opter, it is the service account and its permissions that are used in the background during the export/import process between Opter and Fortnox. (In other words, the integration uses the service account.)
More information:
Collection and delivery dates on the web portals (44 June 2025)
Columns Pickup time (actual) and Delivery time (actual) now contain both the date and the time, making it easier to check delivery accuracy directly in the web portals. The columns are called Picked up (actual time) and Delivered (actual time) in the internet order settings.

More information:
Address details for new consignments (2025.06.42)
It is now possible to customise the address fields for new consignments created in the dispatch system in the same way as in the order reception department. Which address fields are displayed is determined by the order view set for the consignment type.

More information:
New columns for regions in dispatch (31 June 2025)
Previously, it was only possible to display the order’s region in the lists in the dispatch centre. The following columns are now available:
– Region name/Region code: The region on the shipment.
– Region name (order)/Region code (order): The region is on the agenda.
– Region name (auto)/Region code (auto): The region associated with the shipment is displayed first. If the shipment is not associated with a region, the region on the order is displayed.
More information:
Supplier bill adjustments for subcontractors
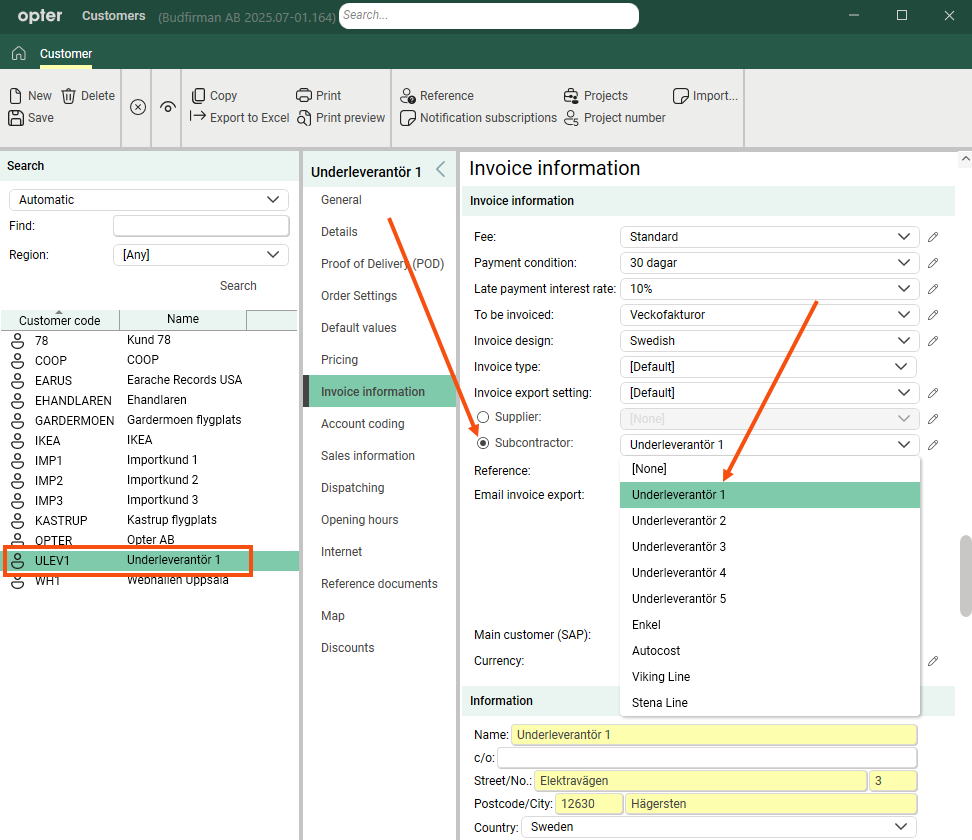
It is now possible to invoice subcontractors and create supplier bill adjustments automatically, in the same way as for suppliers. The amount of the invoice will be deducted from the subcontractor’s next supplier bill.
Add the subcontractor as a customer and select the subcontractor on the tab Invoice information. Create an order and invoice the deductions as usual.
More information:
Start the consignment at the vehicle’s most recent delivery address
If you want the vehicle/resource to be paid for the empty leg between the delivery address of the last shipment and the first collection address for the consignment, you can add the delivery address of the last shipment as the new start address for the consignment.
The suggested new start address is displayed in a pop-up window. If you want the new start address to be added, select Yes/Yes in response to the question in the pop-up window.

More information:
Paste ranges from Excel
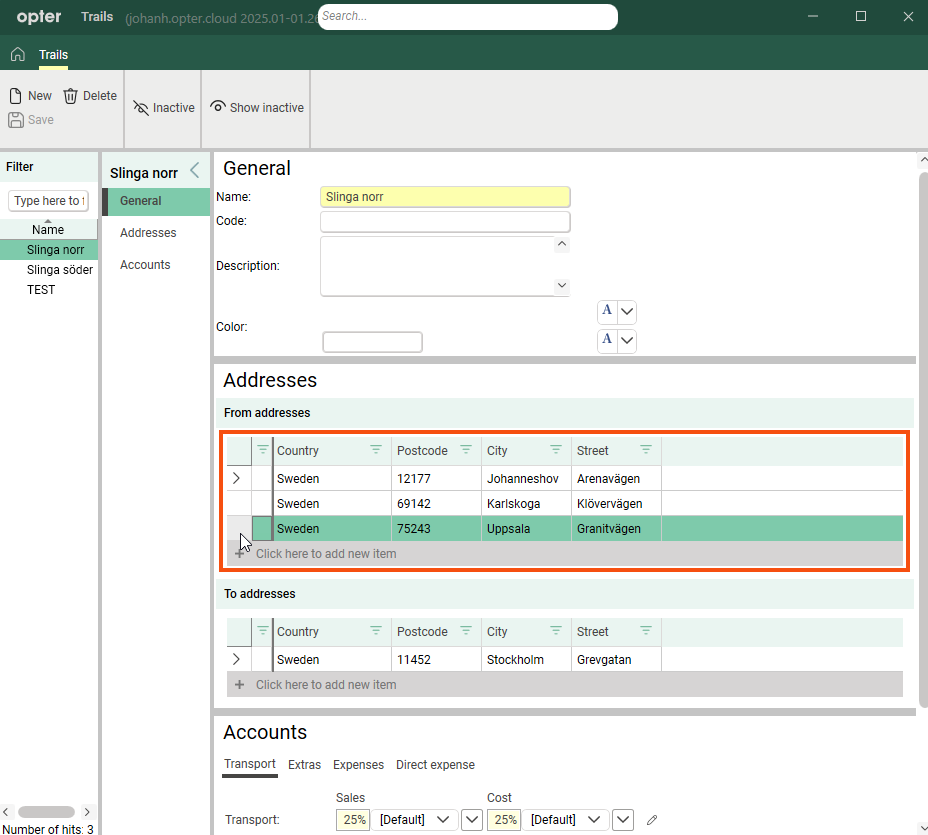
It is now possible to paste trails from Excel. The columns for country, postcode, town and street in Excel must be in the same order as in the window Trails. Select the rows in Excel and copy them. Then create a new line in window Trails and paste using Ctrl+V, or overwrite the existing address lines by placing the cursor on the first line and pasting.
It doesn’t matter if you copy the header row in Excel, as it won’t be included when you paste the address lines into Opter.
EDI – batch export
It is now possible to convert batch-exported XML files into a format that the recipient can process. Batch exports can be carried out at regular intervals or at a specific time of day.
To ensure that the exported XML file does not become too large, it contains a maximum of 100 order events or attachments, up to a limit that you set in the Max. size for attachments per batch (MB) field on the link. The default setting is 16 MB. If the batch contains more than 100 events, or attachments that exceed the limit you set, additional export files will be created containing the remaining events in the batch.
If you are already batch-exporting files via EDI, the export transformation will need to be adjusted when you receive this update. Please contact edi@opter.com for further information.
More information:
Create routes using house numbers
Previously, it was possible to specify the country, postcode, town and street name when creating the collection and delivery areas for distribution routes. It is now also possible to enter a house number, for example “56” or a range such as “58–62”.
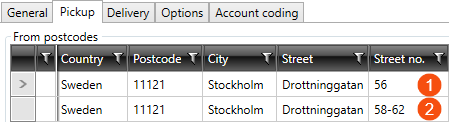
If you have large volumes of goods to or from the same street, it may be useful to specify the street number.
More information:
New columns in the route optimisation log
In the route optimisation log in the order reception module, you can view the history of route optimisations for orders and shipments. The route optimisation log is mainly used for troubleshooting.
The following new columns have been added:
-
Route sequence - from: displays the route sequence of the pickup addresses.
-
Route sequence - to: displays the route sequence of the delivery addresses.
More information:
Opter Driver – status change in the map view
It is no longer possible to change the status of a shipment directly on the map. You can re-enable this feature by setting the mobile data setting ChangeShipmentStatusFromMapPermission to “True”. The driver can then change their status by tapping an address and then the plus sign in the box that opens. On Android devices, you can also press and hold the address to change its status straight away.
If the status change requires a POD, the POD view opens when the driver taps the plus sign or presses and holds it.
Requires Opter Driver 2.4.20.

More information:

