Opter Driver and Opter Terminal
Last updated: 6 July 2026
In this article
Some features of Opter Driver and Opter Terminal may require a specific version of Opter.
Opter Driver is available for iOS and Android. For Android, the app is available in two variants, Opter Driver (classic) and Opter Driver Labs. All new features below apply to the iOS app and Opter Driver Labs unless otherwise stated. Opter Driver for iOS and Opter Driver Labs for Android have the same version number.
Opter Terminal is only available for Android.
We recommend that you always use the latest version of the apps.
Multiple POD images (2.4.136)
Requires Opter version 2026.06.00 or later.
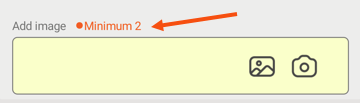
You can now add as many photos as you like to proofs of delivery in the app. (Previously, it was only possible to add one image to the proof of delivery.)
If the Add image field is yellow, this means you must add at least one image. For example, if the text “Minimum 2” appears, you must add at least two images.
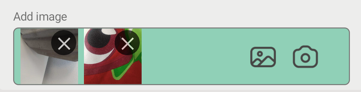
If the field is green, it means you’ve done everything you need to, but you can add more images if you like.
More information:
Show/hide field Remark in the POD view
It is now possible to hide the Remark field in the POD view by setting the mobile data setting PodRemarkEnabled to “false”.
More information:
Opter Terminal: Scan comments using the built-in scanner (83.0)
It is now possible to add scan comments using the built-in scanner on devices that have one, such as Zebra and Honeywell.
More information:
Smart locks (2.4.27)
Smart locks can now be managed in Opter Driver. Click on Unlock {0} in the POD view to open the smart lock app.
On iPhone, Qlocx must be opened manually, as Qlocx does not support opening automatically from other apps on iOS.
If you want to start using smart locks in Opter, you will need to set up an EDI connection that downloads information about the lock to the order. Contact for more information.
Extra dimension 1-5 and extra ID 1-5 (2.4.27)
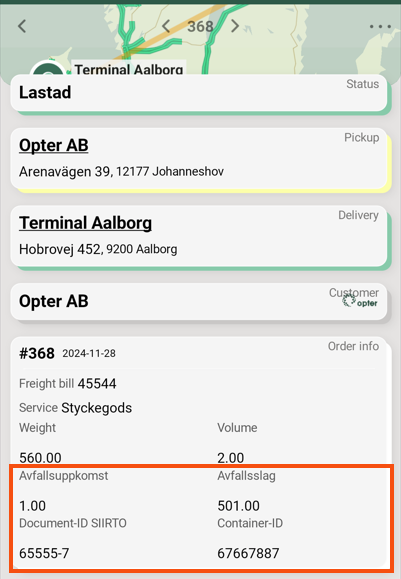
You can use the Mobile data settings SHI_ExtraDimension1Name-SHI_ExtraDimension5Name and SHI_ExtraId1Name-SHI_ExtraId5Name to name the fields Extra dimension 1-Extra dimension 5 and Extra ID 1-Extra ID 5 in Opter Driver.
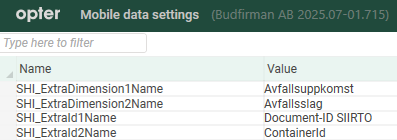
Previously, the names you gave them were only shown in the Changes view, now they are also shown with the correct name in the task list and detail view.
More information:
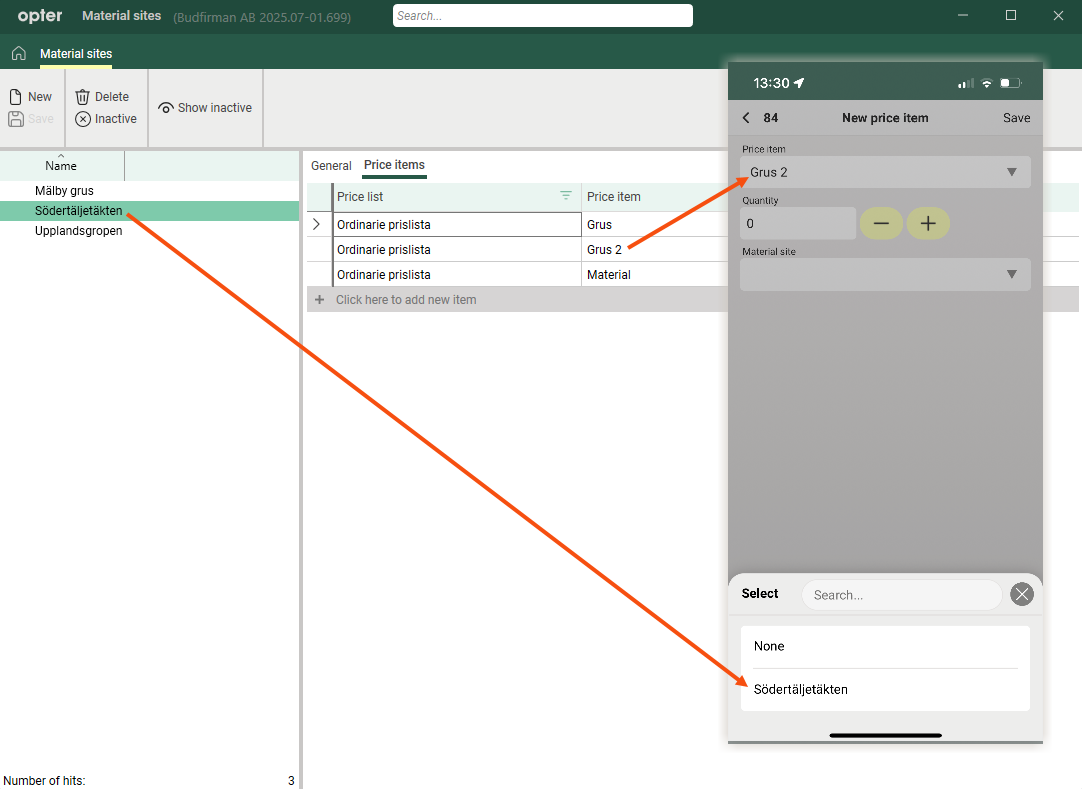
Price item/material site link (2.4.26)
When you add items, and have selected a Price item, only the material sites linked to that item are displayed. And vice versa, if you select the material site first, only the Price items linked to that material site will be displayed. In order to select a material site in the app, the Price item must be linked to the material site on the Price items tab in the Material sites register.
More information:
Print job lists (2.4.25)
It is now possible to print mission lists after departure scan at Terminal. Set PrintAssignmentListPermission to "true" and the driver can send a print request to Opter where the order list can be printed from Order > Terminal printing.
More information:
Using the Bluetooth scanner (2.4.25)
If you want to use a standalone Bluetooth scanner (instead of your mobile phone's built-in camera), select Use Bluetooth scanner on the Settings page in Opter Driver. Then activate Bluetooth on your mobile device and pair with the Bluetooth scanner.
More information:
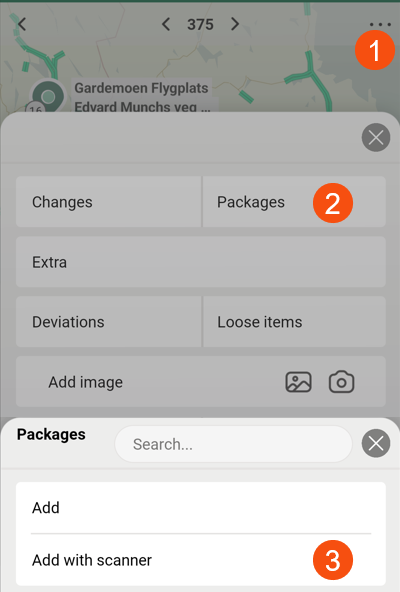
Adding packages with scanning (2.4.25)
You, as a dispatcher/system administrator, decide whether drivers should be able to add new parcels to shipments/orders by scanning the parcel label.
Areas of use:
-
If the driver has received a shipment where he does not know in advance how many packages the shipment has and what the package numbers are.
-
If the driver creates a new order in the app and then wants to scan all the packages included.
If you choose to allow drivers to add packages to shipments/orders by scanning them, you can make exceptions for certain services.
The Add package with scanner feature is already available in Opter Driver (classic) for Android, but is improved in Opter Driver for iOS and Opter Driver Labs for Android:
-
The driver can remove packages that were incorrectly scanned.
-
The driver can directly change the dimensions of the packages he adds.
More information:
Early pick-up warning (2.4.25)
As a dispatcher, you can choose whether drivers receive a warning in Opter Driver if they pick up a shipment too early. You make the setting per customer in the customer register.
The warning appears if the following applies:
-
The driver will collect from the sender, or change the status to Picked up, at a time before the earliest collection of the order.
-
This is the first shipment on the order. When scanning, the warning is only displayed during pickup scan at the sender's premises, i.e. not during departure scan at the Terminal.
When the warning appears in the app, the driver can undo the scan/status change or go ahead and still change the status to Picked up. So it's just a warning, not a block.
More information: