New design
Last updated: 28 July 2026
In this article
Applies to Opter as of version 2025.12.00.
Opter has been given a new look, and some features have been improved as part of the new design.
Choose New design or Classic design
In the login window, you can select New design or Classic design by clicking the slider. Opter saves your last selection.
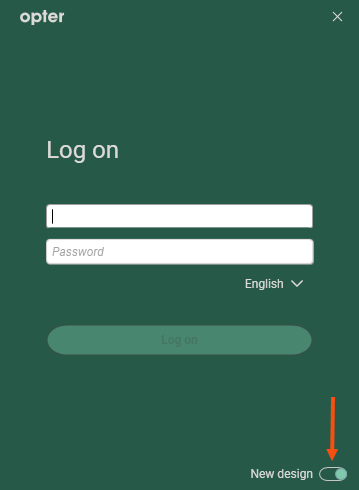
You can still choose to use Opter in the classic design, but we recommend using the new design. The classic design will be removed eventually.
New colours and icons
See the images below and Icons in the Order reception.
Colours in dispatch
Some of the colours in the dispatch have been adjusted so that the default colours for resource boxes and mission status now follow the colour scheme of the new design, whether you are using Opter's new or classic design. If you have previously selected one or more colours in a dispatch settings, all colours in that dispatch setting are retained. If you want to change to Opter’s new default colours, click Settings > Dispatch settings, select the Color settings tab, choose which colour setting you want to change (for example, the colours of the resource boxes) and click the down arrow. The colour selector opens. Click on Automatic and then save your changes. For more information, see Dispatch settings (window).
The new design allows you to freely enter your own colour codes or choose colours from an advanced palette. For more information, see Dispatch settings (window).
Menu tabs instead of traditional menus
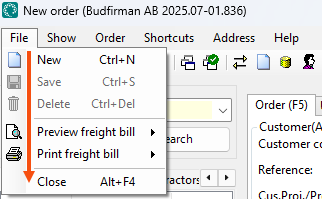
The new design has menu tabs instead of traditional menus in Order reception, for example.
In classic design, the menus open vertically.
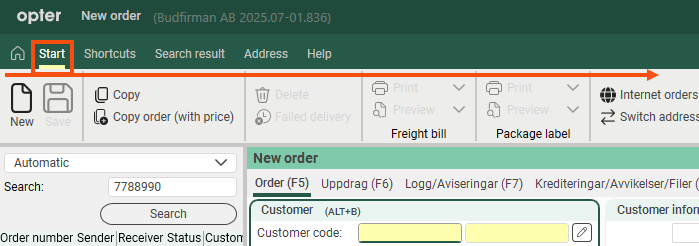
In the new design, menus open horizontally. They are known as ribbon menus.
If you find that the menu area (ribbon menu) takes up too much space in the Order reception window, you can make the ribbon menu smaller (step 1) or close the ribbon menu (step 2) by doing one of the following
-
Press Ctrl + F1.
-
Double-click on the menu tab name (for example Search result).
-
Click on the up arrow to the right of the menu tabs.
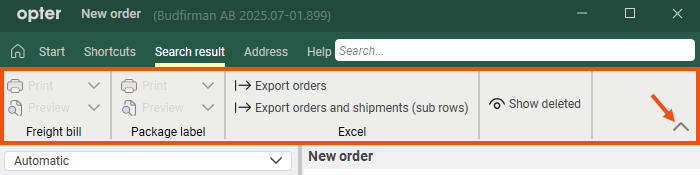
For example, if you click the up arrow once, the ribbon menu will become smaller.

If you then click the up arrow again, the ribbon menu will close.

Opter remembers your last setting.
If the ribbon menu is closed and you want to open it, you can choose to pin the ribbon menu or not:
-
If you want to open and pin the ribbon menu, double-click on any of the menu tabs (for example, Search result) or click once on the down arrow.
The Ribbon menu will remain until you choose to close it.
-
If you want to open the last used ribbon tab again and pin the ribbon menu, press Ctrl + F1.
The Ribbon menu will remain until you choose to close it.
-
If you want to open the ribbon menu, but not pin it, click on one of the menu tabs (for example Search result).
When the ribbon menu is not attached, it will close if, for example, a pop-up window is opened or if you click in a field in the Order reception.
You can dock the ribbon menu at any time by pressing Ctrl + F1, clicking the down arrow, or double-clicking any of the menu tabs.
Show keyboard shortcut
Hover over an option and the keyboard shortcut will appear.
For example, if you hover over Copy, you will see Copy (F9), which means you can press the F9 key to copy an order in the Order reception.
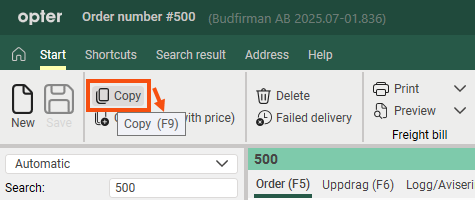
Keyboard shortcuts are displayed in cases where there is a keyboard shortcut.
New keyboard shortcuts
The new design includes some new keyboard shortcutsthey are Ctrl + H, Ctrl + L, Ctrl + F and Ctrl + F1.
Ctrl + H
Opter displays the main page and the cursor moves to the search box at the top of the main page.
Ctrl + H works in all windows (except in modal windows). (Modal windows are pop-ups that lock the main window and require you to do something before you can continue working in the main window.)
Ctrl + H is the same function as clicking on ![]() .
.

Example
You are in any (non-modal) window in Opter:
-
To open the customer register, press Ctrl + H (or click on
 ) and type "customers". Then press Enter to open the customer register.
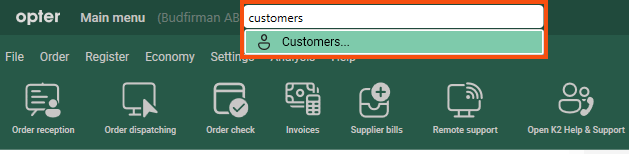
-
To open the customer register for a specific customer, press Ctrl + H (or click on
) and type the customer's name, for example "Kastrup". Then press Enter to open the customer register for that customer.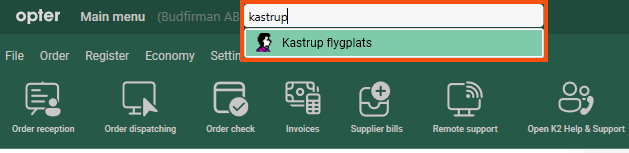
-
To open order number 501, press Ctrl + H (or click on
) and type "501". Then press Enter to open order 501.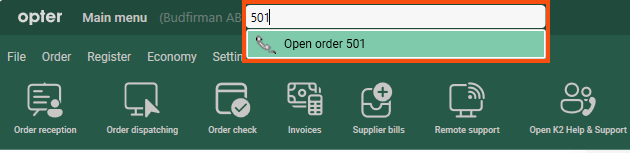
Ctrl + L
If you press Ctrl + L:
-
In the Order reception and in the registers, the cursor jumps to the field where you can search for settings such as the name of a checkbox, drop-down list or a field in the Order reception/register.
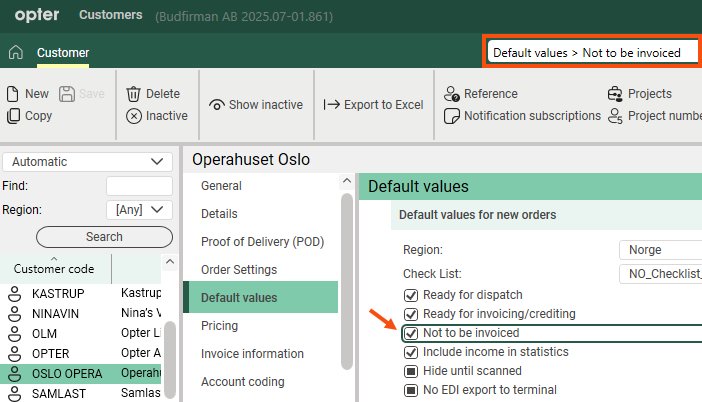
In the image above, we have pressed Ctrl + L in the customer register, typed the name of a tick box (Not to be invoiced) and pressed Enter. Opter looks for the tick box in the register and marks it so that we can find it quickly.
-
On the main page, the cursor jumps to the search bar at the top.
Ctrl + F
If you press Ctrl + F:
-
In Order reception, dispatch and customer register (for example), the cursor jumps to the search field. Type what you are looking for, such as a waybill number, and then press Enter or click on Search.


-
On the main page, the cursor jumps to the search bar at the top.
-
In registers, such as the subcontractor register, the cursor jumps to the field where you can filter the list of subcontractors.
Ctrl + F1
If you find that the menu area (ribbon menu) takes up too much space in the Order reception window, you can make the ribbon menu smaller (step 1) or close the ribbon menu (step 2) by doing one of the following
-
Press Ctrl + F1.
-
Double-click on the menu tab name (for example Search result).
-
Click on the up arrow to the right of the menu tabs.
For example, if you press Ctrl + F1 once or click the up arrow, the ribbon menu will become smaller.
If you then press Ctrl + F1 again or click the up arrow once more, the ribbon menu will close.
Opter remembers your last setting.
If the ribbon menu is closed and you want to open it, you can choose to pin the ribbon menu or not:
-
If you want to open and pin the ribbon menu, double-click on any of the menu tabs (for example, Search result) or click once on the down arrow.
The Ribbon menu will remain until you choose to close it.
-
If you want to open the last used ribbon tab again and pin the ribbon menu, press Ctrl + F1.
The Ribbon menu will remain until you choose to close it.
-
If you want to open the ribbon menu, but not pin it, click on one of the menu tabs (for example Search result).
When the ribbon menu is not attached, it will close if, for example, a pop-up window is opened or if you click in a field in the Order reception.
You can dock the ribbon menu at any time by pressing Ctrl + F1, clicking the down arrow, or double-clicking any of the menu tabs.
Quick search in Order reception
New quick search in Order reception.
Select Automatic and enter the Order number, Invoice number, Consignment note number, Parcel number, Consignor reference, Consignee reference or Extra ID 1-Extra ID 5 in the search field. Press Search or Enter. Opter then searches for orders with order dates in the last three months.
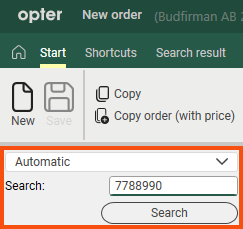
If you enter a customer code in the search bar, Opter will display the most recent orders in the dispatch where the customer code matches. If you leave the search field blank and click on Search, Opter will display the most recent orders in the dispatch. More details on the quick search function can be found in Order reception.
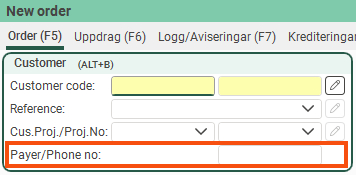
Indication of hidden fields in Order reception
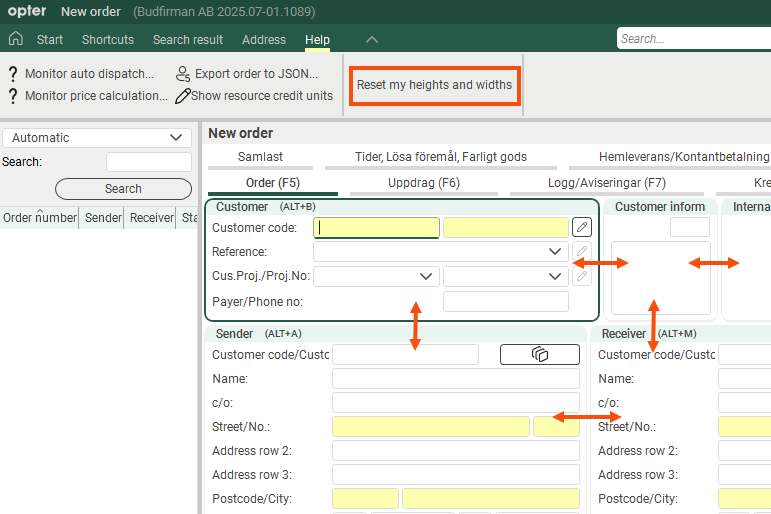
If there are fields that are not displayed in a group in the Order reception, Opter indicates this by means of three small dots in the frame.
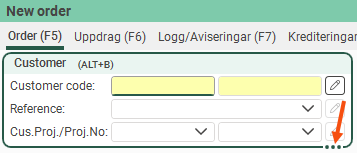
If you want to see all the fields, drag the frame. The dots disappear when all fields are displayed.
Size adjustments to orders received in the order reception are saved per user and per computer
In the order reception area, each individual user can adjust the size (height/width) of the groups by dragging the group’s borders. (See the image below.) Opter saves group sizes by order setting, user and computer.
In other words, if you adjust the group sizes in the order reception screen, Opter will automatically save your adjustments (for the current order settings), so that the order reception screen will look the same the next time you open it. If you work on different computers (with, for example, different resolutions or screen sizes), Opter will save your settings for each computer.
If you have adjusted the group sizes and later wish to revert to the default setting, click the Reset my heights and widths button (in the order reception section under Help). The group sizes in your order reception will then be reset to the default values saved for the current order settings. If you wish to save new standard dimensions for an order configuration, press the Make my settings the default button on the Tab settings tab in the window Order entry settings.
Create a new default setting for size adjustments in order reception
In window Order entry settings on the Tab settings tab, you will find the button Make my settings the default.
If you click the Make my settings the default button, the following will happen for the order setting highlighted in the list on the left:
-
The dimensions (height/width) of the groups in the order reception area that you currently have will be set as the new default for all users who have not made their own adjustments to the dimensions.
-
Users who have made their own size adjustments will retain them, but if they press the Reset my heights and widths button (in the order reception under Help), your current size adjustments will take precedence. (If they subsequently make their own adjustments, Opter will automatically save those adjustments for each order setting, user and computer.)
Once one of you has clicked the Make my settings the default button, you cannot remove the new default setting (for your Opter), but you can always adjust the sizes in the order reception again and then save them as the default by clicking the Make my settings the default button once more.
For more information, see Order entry settings (window).
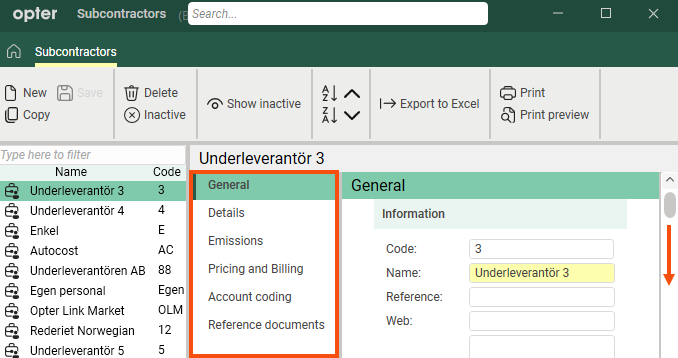
Scroll between tabs in the registers
In the registers, the tabs are displayed vertically in the new design and you can scroll between the tabs.
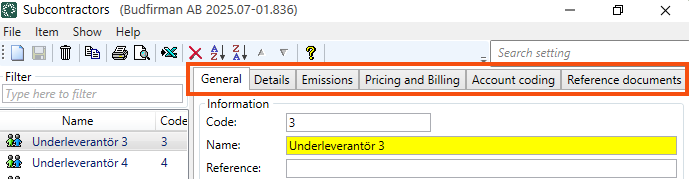
In classic design, tabs are displayed horizontally (and you cannot scroll between them).
Attach a tab
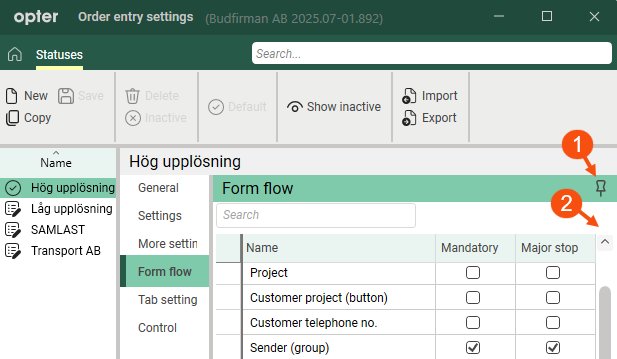
To make it easier to work with the settings, you can pin certain tabs by clicking on ![]() (1) in the image below.
(1) in the image below.
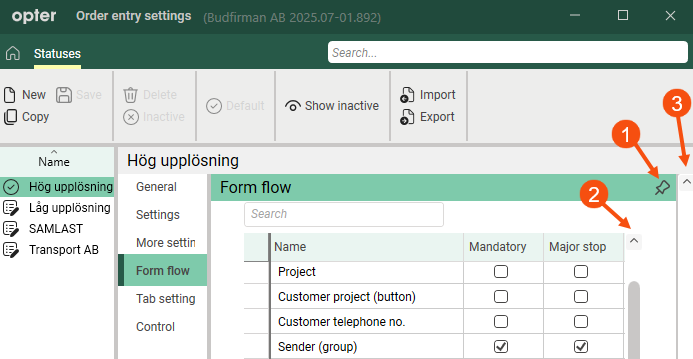
The picture above shows what it looks like on the Form flow tab in the Order entry settings window if you have not pinned the tab. Both the list scroll bar (2) and the window scroll bar (3) are displayed.
The image below shows what it looks like in the Order entry settings window when you have tabbed Form flow. The scroll bar of the list (2) is still displayed, but the window's scroll bar is not displayed. The list of settings has been maximised.
For example, you can attach the following tabs:
-
Tabs in the window Dispatch settings.
-
Form flow in the window Order entry settings.
When you no longer want the tab to be pinned, click on ![]() (1) in the image above or click on any other tab.
(1) in the image above or click on any other tab.
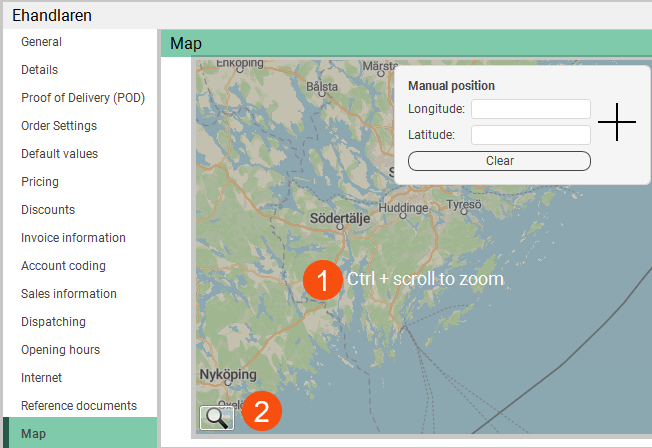
Scroll through maps
In the customer register and in the Adjust address positions window, you can zoom in on the map in one of the following ways:
-
In the new design, you can zoom by holding down the Ctrl key and scrolling. The text (1) is displayed if you scroll without holding down the Ctrl key.
In the Opter Classic design, you can zoom in on the map by scrolling.
-
Click on the magnifying glass (2), then click + or -, or drag the slider up or down. This approach works for both classic and modern designs.
For more information, see Adjust address positions (window) and Customers (window).