Order reception
Last updated: 25 March 2026
In this article
In order reception, it is only possible to work on one order at a time, but multiple orders can be searched for and displayed in a list.
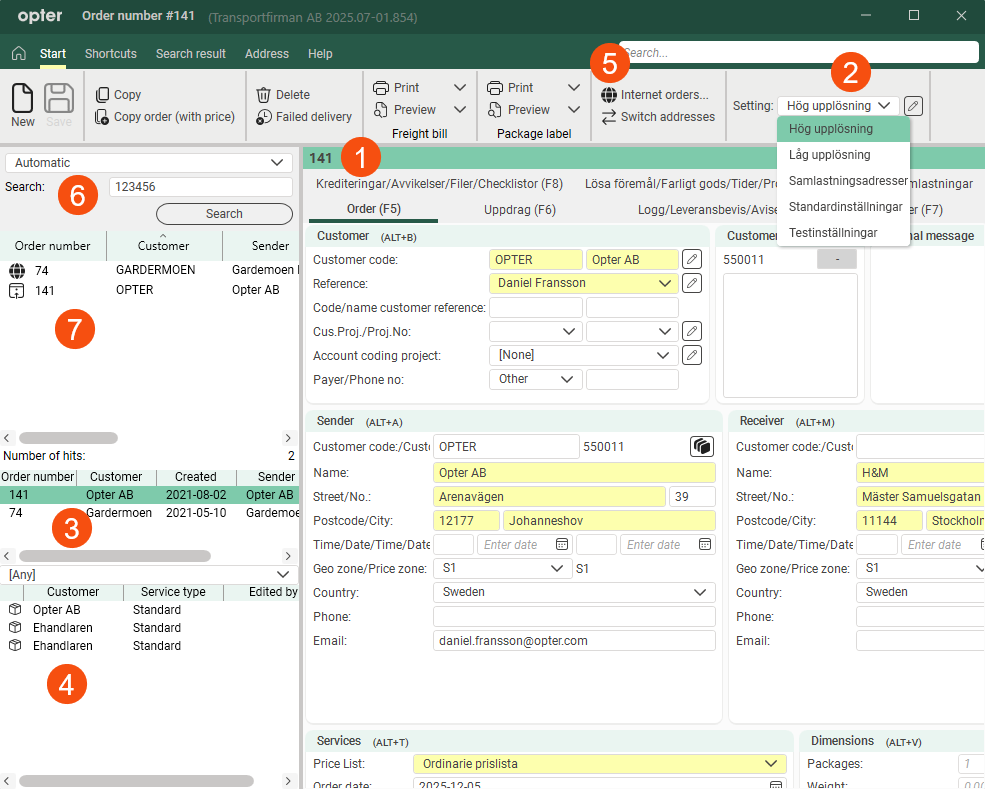
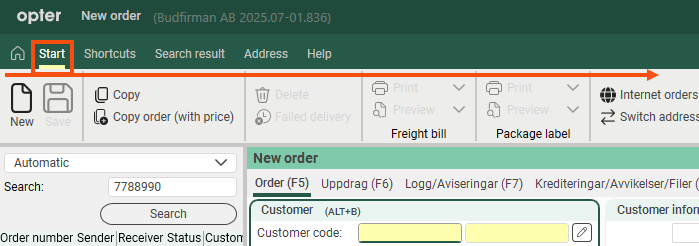
The actual order page with all the information about the order is on the right. The Order number is shown at the top in bold (1). The information displayed on the order can be freely customised and several views can be saved and switched between (2). Open the order settings with ![]() .
.
Default views for different screen sizes are included in the installation, and a custom view is often created during start-up. For more information on how to set up order reception, see Organising the groups in Order reception.
If an order is edited, it will be closed automatically when it has been saved. You can open it again from the list under the search results on the left (3).
At the bottom left, there is a list of orders created on the web portals, which need to be authorised (4). The list can be filtered by region. Click on Internet orders in the Start menu to display a list of orders to be authorised (5).
On the left is the search function (6) and the search results (7)
Order search
To search for an order, first select what you want to search for from the drop-down list, and then further specify the search with the options displayed. The search criteria displayed depend on what is selected in the drop-down list.
Quick search
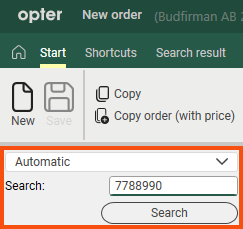
With the search option Automatic, you can search the following fields without having to select one category at a time.
The quick search applies to orders with order dates in the last three months:
-
Order number
-
invoice number, with invoice dates in the last three months
-
consignment note number, at least six digits
-
parcel number, at least six digits
-
sender reference, not case sensitive
-
recipient reference, not case sensitive
-
extra ID 1-5, not case sensitive.
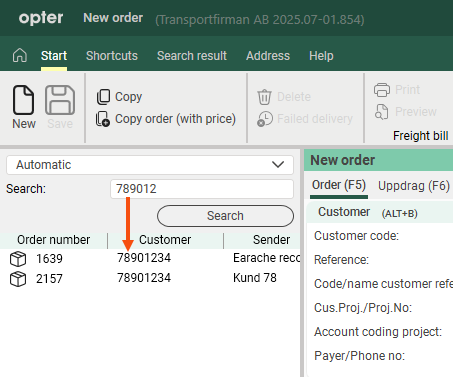
If you do not enter a search string at all and simply click on Search, the 50 most recent orders from dispatch that have not yet been dispatched will be displayed. If the search does not return an exact match for the above fields, orders will be displayed where the search string matches the customer code.
Example:
-
"4043" gives a match for the Order number, invoice number, additional IDs and references. Not consignment note numbers and parcel numbers as they must be at least six digits.
-
"404312" gives a hit on all fields. If there is no exact match, but you have a customer code starting with "404312", that customer's orders will be displayed with order dates in the last three months.
-
"daniel" returns hits for "Daniel" and "DANIEL" but not "Daniel Fransson" because the search string must match the value in the fields exactly.
-
" " shows the last 50 orders.
You can use Automatic to retrieve current orders from customers by searching the first part of the customer code. It works regardless of whether the customer codes consist of numbers or letters. However, if the search matches any other of the fields exactly, that order will be displayed instead. For example, "opt" shows the latest orders with the customer code "Opter".
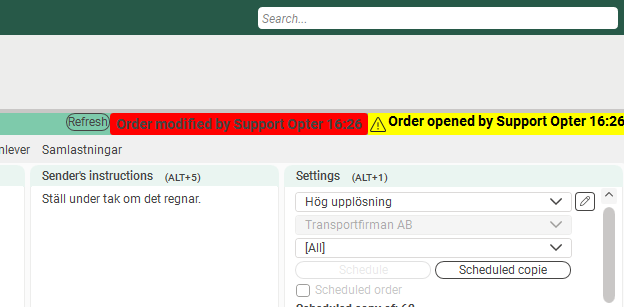
Warning if an order is open in several sessions at the same time
A yellow warning appears in the top right corner an order is opened that is already open in another session, or if someone else opens an order that you have open. When the order is saved and closed in the second session, the warning will turn red and you can choose to update the order with those changes by clicking on Refresh. If you want to save your own changes instead, save the order as usual and the changes made by the other person will be overwritten.
Minimise the menu area
The new design features menu tabs instead of traditional menus in the order reception section, for example. The new design is available from Opter version 2025.12.00 onwards.
In the new design, the menus open horizontally. These are what are known as ribbon menus.
If you feel that the ribbon menu takes up too much space in the order reception window, you can minimise the ribbon menu (step 1) or close it (step 2) by doing one of the following:
-
Press Ctrl + F1.
-
Double-click on the name of the menu tab (for example Search result).
-
Click the up arrow to the right of the menu tabs.
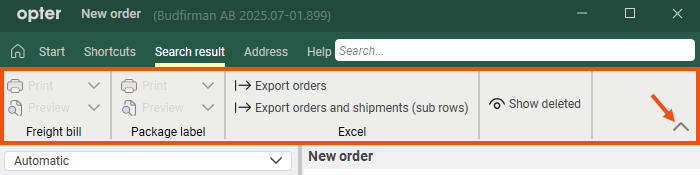
For example, if you click the up arrow once, the ribbon menu will shrink.

If you then click the up arrow again, the ribbon menu will close.

Opter remembers your last setting.
If the ribbon menu is closed and you want to open it, you can choose whether or not to dock the ribbon menu:
-
If you want to open and pin the ribbon menu, double-click on one of the menu tabs (for example, Search result) or click once on the down arrow.
The Ribbon menu will then remain open until you choose to close it.
-
If you want to reopen the most recently used menu tab and pin the ribbon menu, press Ctrl + F1.
The Ribbon menu will then remain open until you choose to close it.
-
If you want to open the ribbon menu but not dock it, click on one of the menu tabs (for example Search result).
When the ribbon menu is not docked, it will close if, for example, a pop-up window opens or if you click in a field in the order reception screen.
You can dock the ribbon menu at any time by pressing Ctrl + F1, clicking the down arrow, or double-clicking any of the menu tabs.