Last updated: 09.10.2023
Using the scan list in Opter Terminal
In this article
Once a package has been scanned, the result of the scan are displayed in a list. The scan list can be organised in two different ways:
-
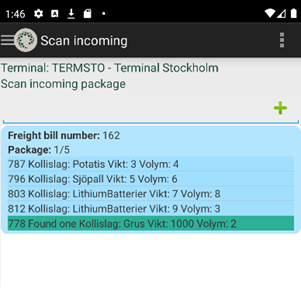
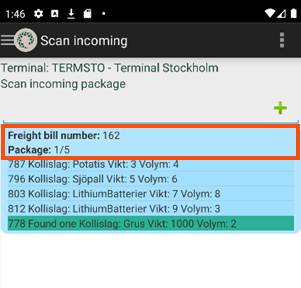
All the packages fin the same shipment are displayed together in one block. This makes it possible to see which packages in a shipment have been scanned (green background) and which have not (blue background).
-
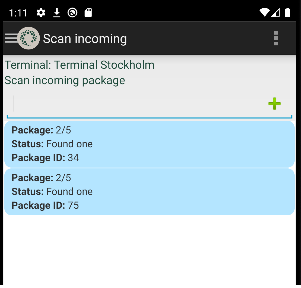
Each scanned package is displayed as a separate block. In this case, only the packages that have actually been scanned can be viewed and managed.
It is also possible to define what information is shown about the packages. The scan list settings are made in Opter (see Customising the scan list in Opter Terminal).
If load carriers are being scanned, the scan list may look slightly different. For more information, see Handling load carriers in Opter Terminal.
Once a package has been scanned, the following can be done, depending on the layout of the scan list:
One block for all packages on a shipment (onescanrow enabled="true")
-
Tap on a package to open the detail view. where it is possible to add extras to the order and print a new package label, for example.
-
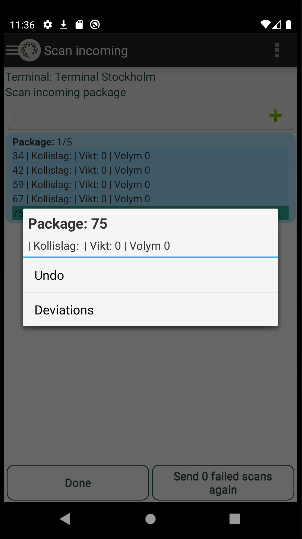
Long press and select whether to cancel the scan or register a deviation.
-
Press above the packages to open the detail view for the last scanned package. When a package is scanned, it appears at the bottom of the block, so this option can be useful if there are a lot of packages in the shipment, as in this case there is no need to scroll to the end of the list.
One block per scanned parcel (onescanrow enabled="false")
With this layout, only scanned packages are displayed in the list.
-
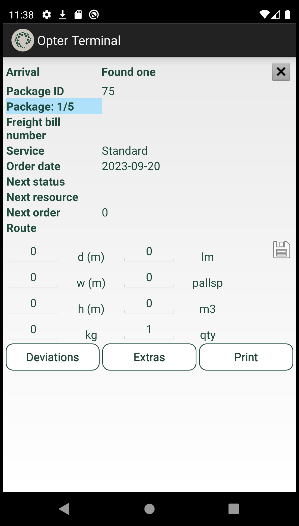
Tap on a package to open the detail view, where it is possible to change the dimensions (such as weight and volume), register deviations and extras, or print a new package label.
-
Long press on a package and select whether to cancel the scan or register a deviation.
