Create manual invoice
Last updated: 25 February 2026
In this article
Your customers can be invoiced directly from Opter. The content of invoices is normally taken from the orders that you decide to invoice when you create an invoice period, but you can also create both invoices and correction invoices manually if necessary.
These instructions describe how to create:
-
Manual invoices.
-
Manual correction invoices.
(If the invoice period has not been closed, you do not need to credit an incorrect invoice; simply remove it from the period.)
Proceed as follows
-
Click on Majandus > Arved > Arved. The Arved window opens.
-
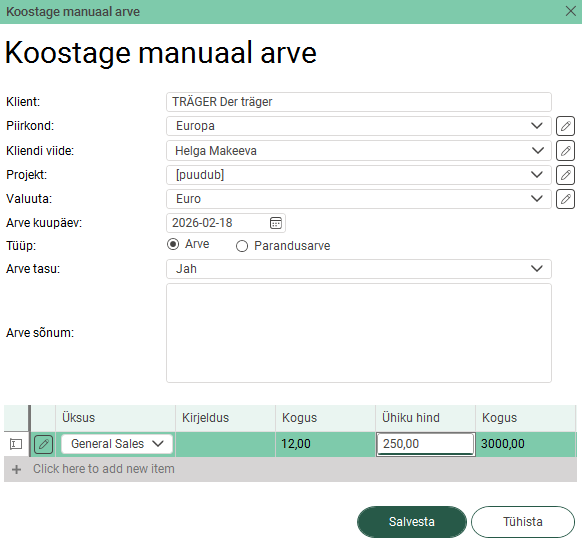
Click on Fail > Manuaalarve. The Koostage manuaal arve window opens.
-
Fill in the invoice header:
-
Klient: Start typing your customer code or customer name to search. Select a customer from the list.
-
Piirkond: Select the region.
It is only mandatory to specify the region if the checkbox Eraldi arvete numbrid piirkondade jaoks is selected on the Arve seaded tab in the office settings.
If you want to add a new region to the register or make changes, press
 to the right of the field. This will open the Piirkonnad window. For more information, see Offices and regions.
 -
Kliendi viide: (Optional.) Select or enter customer reference.
If you want to add a new customer reference to the register or change something, press
to the right of the field. This opens the window Kliendi viide. For more information, see Kliendi viide (window). (If the button () cannot be pressed, fill in field Klient first.) -
Projekt: (Optional.) Select customer project.
If you want to add a new letter to the register or change something, press
to the right of the field. This will open the Projekt window. (Alternatively, you can click on Register > Kliendid, select the customer from the list on the left, and then click on  or
or  Projektid at the top of the menu.)
 -
Valuuta: The currency is automatically set to the customer's currency (according to field Valuuta in the customer register), but you can change the currency if you wish.
If you want to add a new currency to the register or change something, press
to the right of the field. This opens the window Valuutad. For more information, see Valuutad (window) and Currencies. -
Arve kuupäev: Select the desired invoice date. (Today's date is managed.)
-
Tüüp: Select either Arve (debit invoice) or Parandusarve. (For more information, see Correcting invoices.)
-
Arve tasu: Select whether to add, omit or deduct the invoice fee:
-
Jah: The invoice fee is added (as a positive amount) to the invoice, i.e. the customer is charged the fee. For more information, see Invoice fee.
-
Ei: No invoice fee is added to the invoice.
-
Negatiivne: The invoice fee is added as a negative amount (deduction).
The option Negatiivne is therefore used to credit/deduct the invoice fee instead of debiting it. This may be relevant, for example, in the case of a correction or compensation where you want to refund the customer for a previously charged fee.
-
-
Arve sõnum: (Optional.) Enter any text you want to appear on the invoice.
-
-
Add invoice lines to the table at the bottom:
-
Üksus: Select a price item from the drop-down list.
If you want to add new price items, click on
on the left. The Kaubad (manuaal arve jaoks) window opens. -
Kirjeldus: (Optional.) Enter a description of the item line.
-
Kogus: Enter the quantity for the price item on the line.
-
Ühiku hind: Enter price per item.
-
Kogus: Calculated automatically (Kogus x Ühiku hind).
If you need more rows, click on Click here to add new item at the bottom of the list to create a new row.
To delete a row, click on the leftmost part of the row and press the Delete key.
-
-
Click the Salvesta button at the bottom of the window to create the invoice.
If the fields are filled in correctly, the invoice is created and assigned an invoice number in the invoice number series for manual invoices or manual correction invoices. For more information, see Arve tüübid (window) and Arve numbri seeria (window).
Export and printing are done in the same way as for normal invoices.
You can decide what the actual invoice sent to the customer should look like and what information is displayed on it. For more information, see Default settings for invoices.