Last updated: 02.08.2022
Installing the Opter Cloud client
The Opter Cloud client is installed as follows:
-
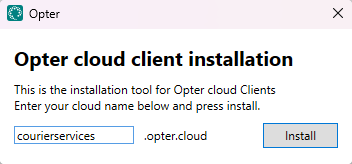
Download and run the installation program: https://download.opter.com/CloudClientInstaller.exe.
-
Enter your cloud name in lower case letters without spaces, for example “courierservices”.

-
Click on Install. When the installation is finished, click Close.
-
Open Opter from the Start menu in Windows and log in with the login credentials you received from the system owner.
Once the client has been installed, you can proceed to create user accounts. For more information, see User accounts for the Opter client.