Installing Opter on a terminal server
Last updated: 12.06.2024
In this article
To install Opter, .NET Framework 4.6.2 has to be installed on the computer.
-
Go to https://www.microsoft.com/net/download/dotnet-framework-runtime.
-
Download .NET Framework Runtime.
-
Follow the installation instructions. The installation can take up to an hour to complete.
Installing Opter
How to install Opter:
-
Download and run https://download.opter.com/Opter.Main.InstallationTool.exe.
-
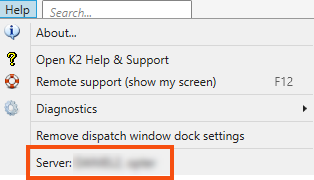
Enter the name of the Opter server (SQL server) in the Server field (the computer name is filled in by default). In an already existing installation of Opter, the server name appears at the bottom of the Help menu.
-
Select the authentication method in the Security drop-down list. The most common is Windows Authentication. If SQL Server Authentication is being used, enter the user name and password for the SQL Server account. Ask the system administrator if you do not know which authentication method is used in your system.
-
Click on Connect. The installation tool opens.
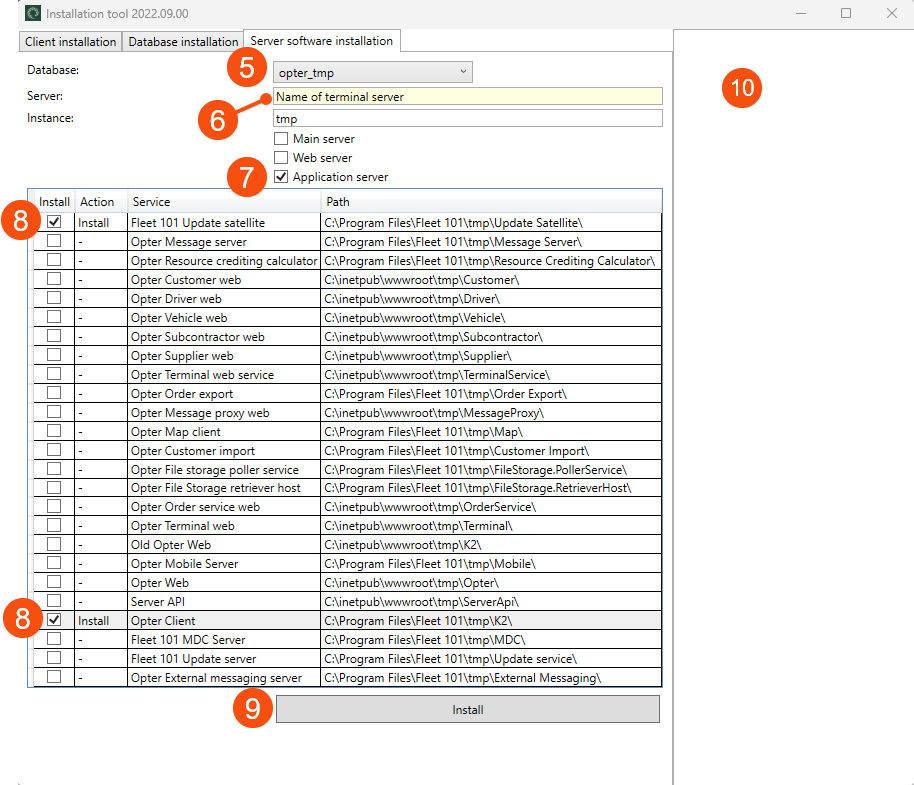
- Go to the Server software installation tab and check that the name in the Database field is the same as the database ending, for example “net” for a database called “opter_net”.
-
Enter the name of the terminal server on which the client is being installed in the Server field.
-
Select Application server.
-
Select the Fleet 101 Update satellite and Opter Client checkboxes in the list.
-
Click on Install.
-
Check that no error messages appear in the box on the right.