Install the Opter client on a Windows computer (own server environment)
Last updated: 7 April 2022
In this article
If you have Opter Cloud, see Installing the Opter Cloud client.
Step 1: Installing the .NET Framework
To install Opter, .NET Framework 4.6.2 has to be installed on the computer.
-
Go to https://www.microsoft.com/net/download/dotnet-framework-runtime.
-
Download .NET Framework Runtime.
-
Follow the installation instructions. The installation can take up to an hour to complete.
Step 2: Installing Opter
How to install Opter:
-
Download and run the installation program: https://download.opter.com/OpterInstallation.exe.
-
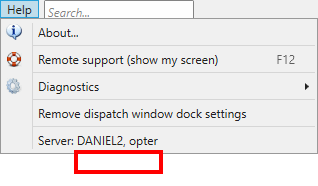
Enter the name of the Opter server (SQL server) in the Server field. In an already existing installation of Opter, the server name appears at the bottom of the Help menu.
-
Select the authentication method in the Security drop-down list. The most common is Windows Authentication. If SQL Server Authentication is being used, enter the user name and password for the SQL Server account. Ask the system administrator if you do not know which authentication method is used in your system.
-
If there are several database instances for Opter, choose the instance applicable to the installation in the Database drop-down list.
-
Click on Install.