Last updated: 08.03.2023
Valid from: 2021.12.00 and later
Alternative email addresses
By default, all messages from Opter are sent using the main account address as the sender (the one on the General tab in the office settings), but it is possible to specify other addresses as the sender. For example, financial messages can be sent from “invoice@courierservices.com” and other messages from “info@courierservices.com”, even though the main account address is “admin@courierservices.com”.
If Use Outlook has been selected on the PDF by email invoice export (File transfer tab), the email account configured in Opter is not used to send messages with attached invoices, but the account configured in Outlook on the user’s computer is used instead. For more information, see , fönster.
Step 1: Enter the new sender addresses
Notifications, emails to subcontractors and other outgoing information (information messages)
If regions are used and different sender addresses are needed for them, enter the address for each region in the Email field on the General tab under Economy > Regions. Otherwise, leave the field blank.
If regions are not used, or the same sender address should be used regardless of the region, enter the new address in the Email field on the General tab in the office settings.
Invoices, supplier bills, invoice reminders and invoice summaries (financial messages)
If regions are used and different sender addresses are needed for them, enter the address for each region in the Email field on the Invoice details tab under Economy > Regions. Otherwise, leave the field blank.
If regions are not used, or the same sender address should be used regardless of the region, enter it in the Email field on the Invoice details tab in the office settings.
If the same sender address should be used for both financial messages and Opter info messages, leave the field on the Invoice details tab blank and enter the new address in the Email field on the General tab in the office settings instead.
Step 2: Set the access rights for the main account
Contact your IT provider and ask them to configure the email account set as the main account in the Servers tab of the office settings so that it has permission to use the alternative addresses as senders.
In Microsoft 365, there are two different ways of sending from another email address, by using delegate access or sending on behalf of that address. If the message is being sent as a delegate, only the address set on the General or Invoice details tab will be displayed as the sender (e.g. “invoice@courierservices.com”). With the second method, the addresses of both the delegate and the main account are displayed as the sender (“admin@courierservices.com”).
Step 3: Test the addresses
Once the IT provider has configured the settings, you can check that they work. Click on Settings > Offices > the Servers > Test email tab. Enter the address to be used as a sender in the Sender field and click on Send. Repeat for all alternative addresses and check that a green OK appears at the bottom of the dialogue box.
Example
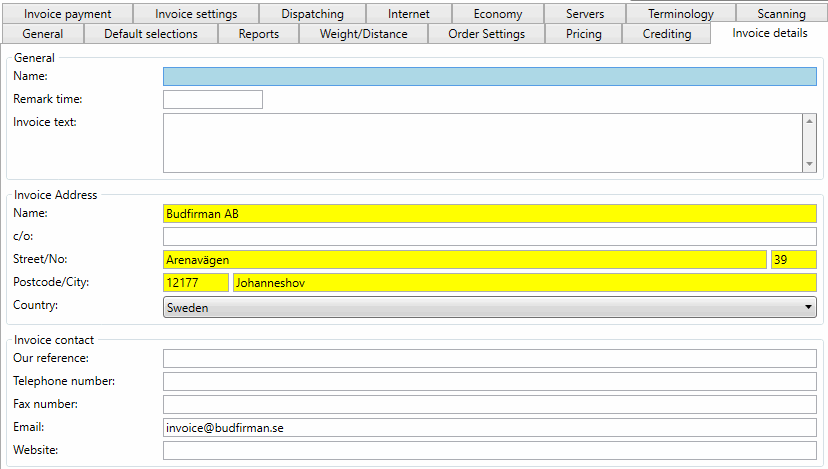
Courier Services has created a Microsoft 365 account with the address “admin@courierservices.com”. This account is used as the main account in Opter and details of the account are specified on the Servers tab of the account settings. But they want to use the “info@courierservices.com” sender address for information messages and the “invoice@courierservices.com” sender address for financial messages, regardless of the region. The “admin@courierservices.com” account has been configured to have permission to send messages as the two addresses in Microsoft 365, and this is what it looks like in the account settings.
The Servers tab.

The General tab.

The Invoice details tab.
