Add the status "Planned" before Määratud
Last updated: 1 November 2024
In this article
To add a new status called "Planned", proceed as follows. Shipments with the status 'Planned' can be assigned to vehicles in dispatch, but are not sent to vehicles or drivers.
Step 1: Create the status "Planned"
-
Click on Seaded > Elutsüklid ja olekud > Staatused tab.
-
Click on Loo uus olek at the bottom under the Olekud list.
-
Enter "Planned" in the Nimi and Interneti nimi fields and save.
-
Select Planned in the list on the left and move it up with
 in the toolbar so that it is between Loodud and Määratud.
Step 2: Add the status to the life cycle
Proceed as follows:
-
Close the Staatused window and select the life cycle you want to work with from the list on the left in the Elutsüklid window.
-
Select Loodud under Olekud.
-
Change all the statuses in the drop-down lists under Seaded to Planned.
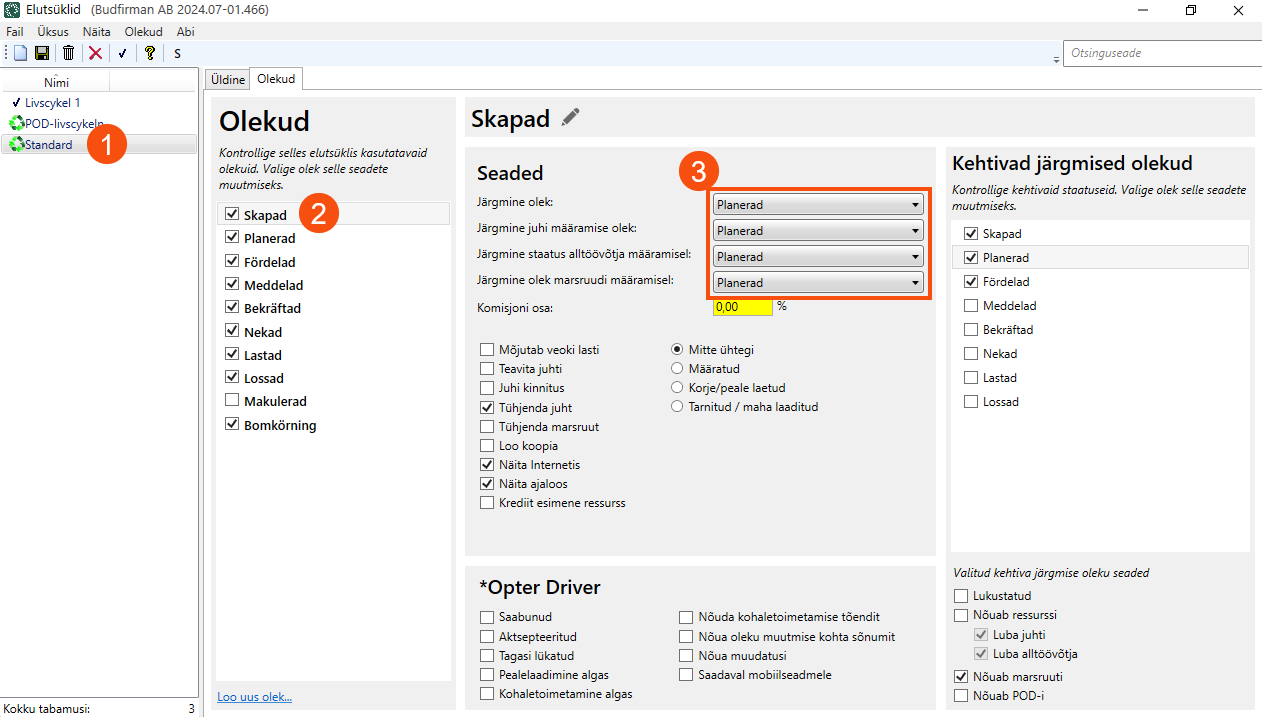
Step 3: Sort in Planned in the status feed
-
Select Loodud under Olekud.
-
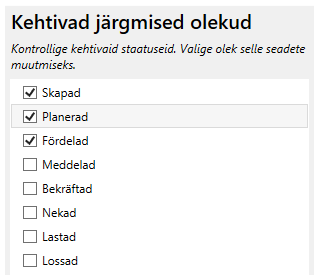
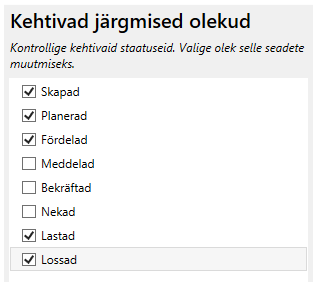
Check that the statuses Planned and Määratud are selected under Kehtivad järgmised olekud.
-
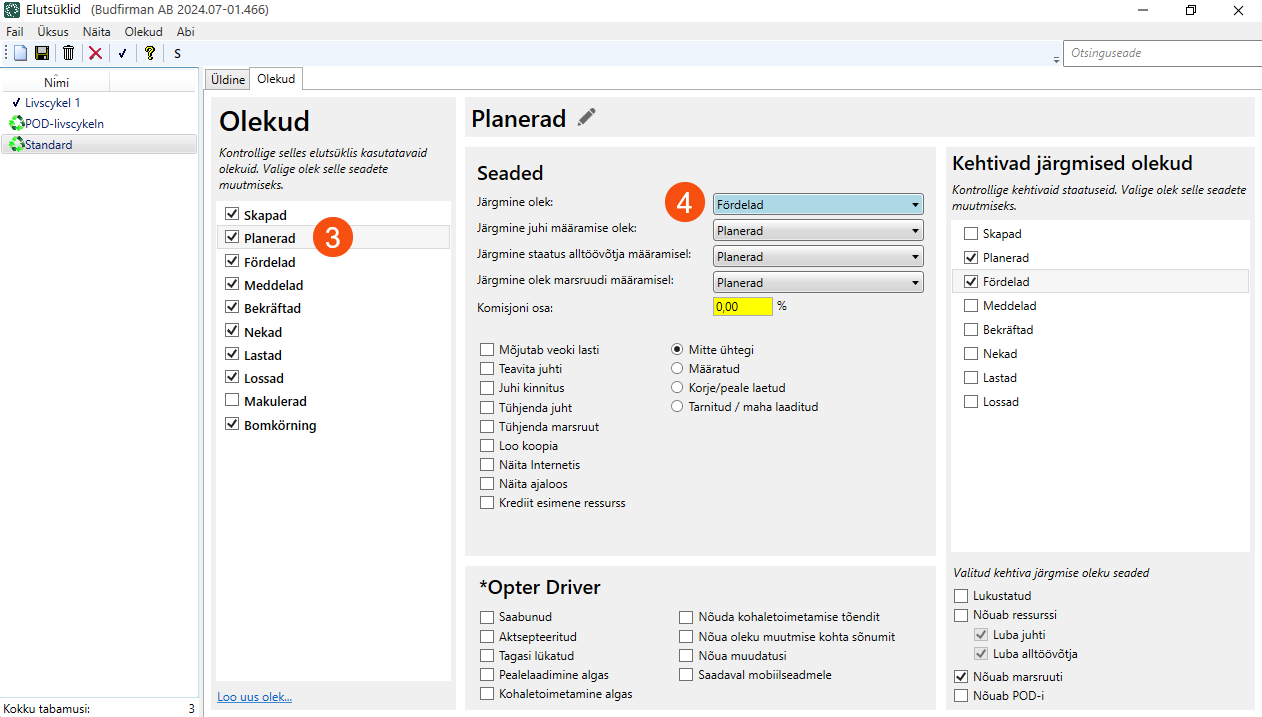
Select Planned under Olekud.
-
Select Määratud from the Järgmine olek drop-down list.
Step 4: Check that the status flow is correct
-
Select Planned under Olekud.
-
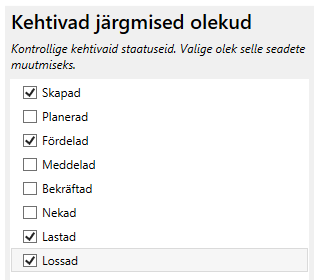
Check that the statuses Loodud, Määratud, Korjatud and Kohale toimetatud are selected under Kehtivad järgmised olekud.
-
Select Määratud in the Olekud box.
-
Check that the statuses Loodud, Planned, Määratud, Korjatud and Kohale toimetatud are selected under Kehtivad järgmised olekud.
Step 5: Add a window for planned missions in dispatch
-
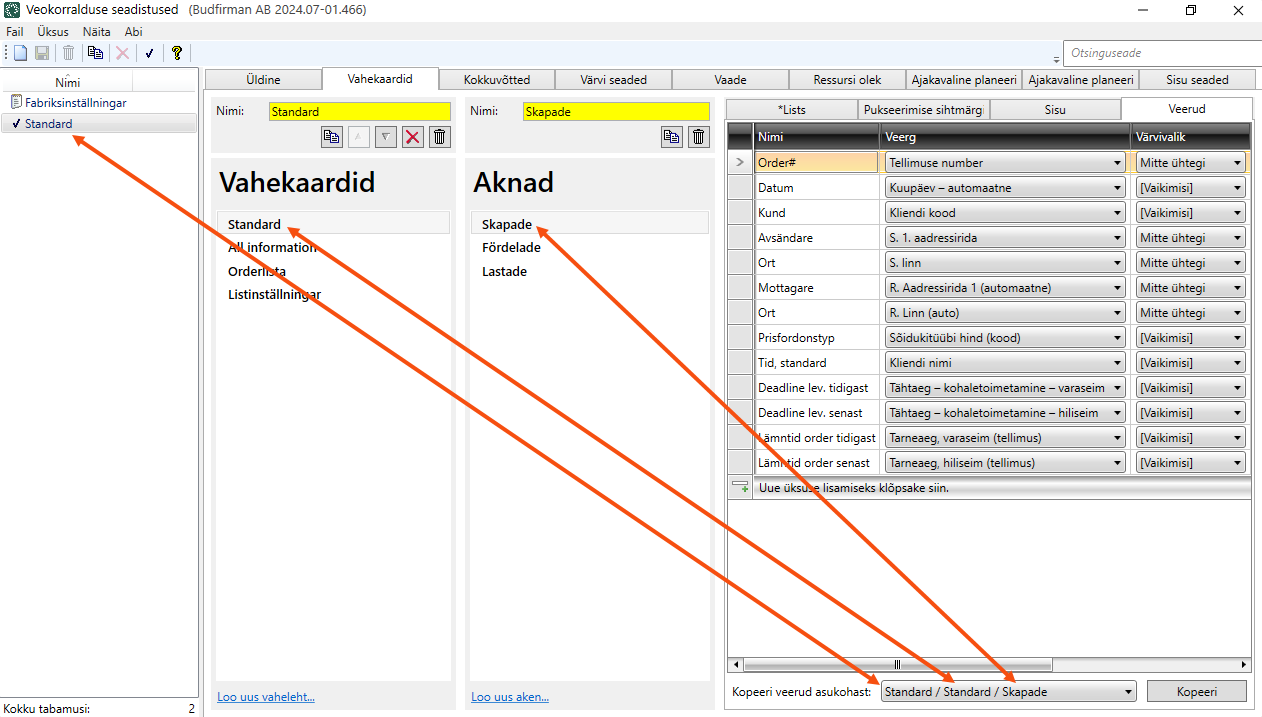
Click on Seaded > Veokorralduse seadistused.
-
Select the configuration you want to work with in the list on the left and go to the Vahekaardid tab.
-
Select the tab to which the window is to be added under Vahekaardid and then click on Loo uus aken at the bottom under Aknad.
-
Make the following settings for the new window:
-
Nimi: "Planned"
-
Kaugus vasakult: 50
-
Kaugus tipust: 0
-
Kõrgus: 33
-
Laius: 100
-
Copy the other settings from the Määratud window.
-
-
Go to the Pukseerimise sihtmärgid tab and select Planned.
-
Go to the Sisu tab and click on Loo uus sisu at the bottom.
-
Click on
 on the new line and make the following settings:
-
Nimi: "Planned".
-
Saadetise olek: Planned.
-
Varasem:

-
Praegune:
-
Tulevik:
-
-
Go to the Veerud tab and copy the columns from the Määratud window by clicking on the Kopeeri veerud asukohast drop-down list and selecting the appropriate configuration/tab/window from the list.
Make room for the new window by moving the Määratud and Korjatud windows. First, select Määratud under Aknad and fill in the following on the Üldine tab:
-
Kaugus tipust: 33
-
Kõrgus: 33
Then select Korjatud under Aknad and fill in the following on the Üldine tab:
-
Kaugus tipust: 66
-
Kõrgus: 33